Agilicus Connector High Availability
High availability, high resilience
Multiple active-active connectors on multiple devices
Overview
The Agilicus Connector can be installed in a high-availability mode. In this mode, multiple copies of the connector will concurrently run. Each connector which is up and healthy will share in some of the network traffic. Encryption keys are shared across the connectors in such a way that they are still in the customer’s sole custody.
NOTE
The Agilicus Connector does not support High Availability if a Share is present. As a work-around, either create a Connector managing all resources other than Shares, or, use the Windows Cluster approach which does support a Share.
The installation instructions for the first connector in a High Availability set are the same, and, for each subsequent one, similar.
Installation
Installation is simple.
- Create and install the first instance on a machine
- Install subsequent instances (up to 4) on other machines
Pre-requisites:
- One connector must be up for a new one to be added
- All connectors must be able to reach the same network resources.
Initial (First) Connector in High Availability Set
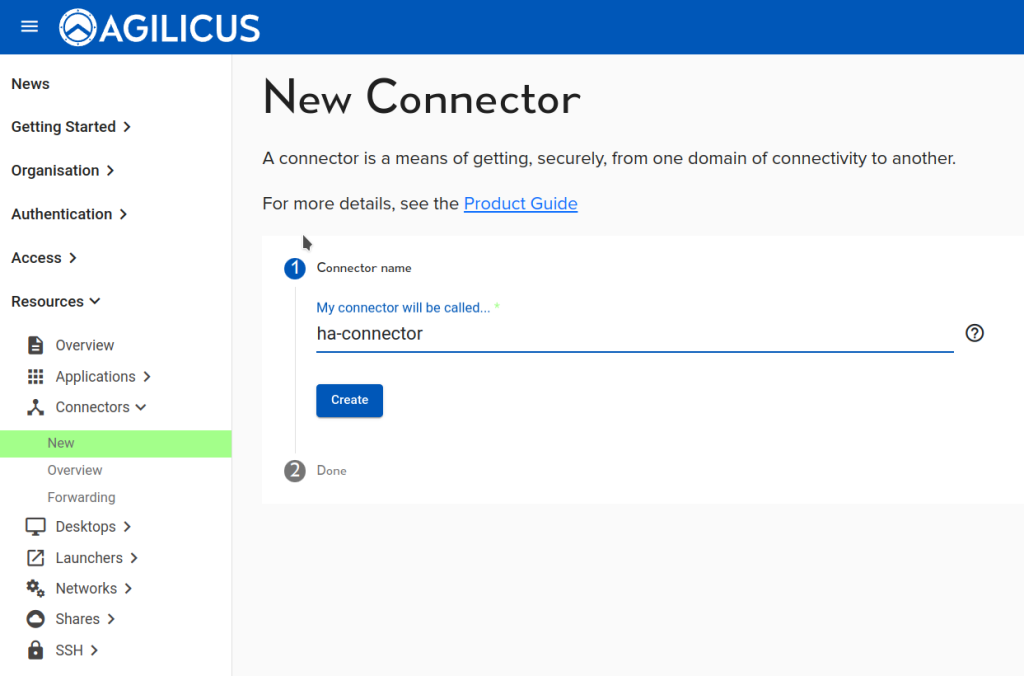
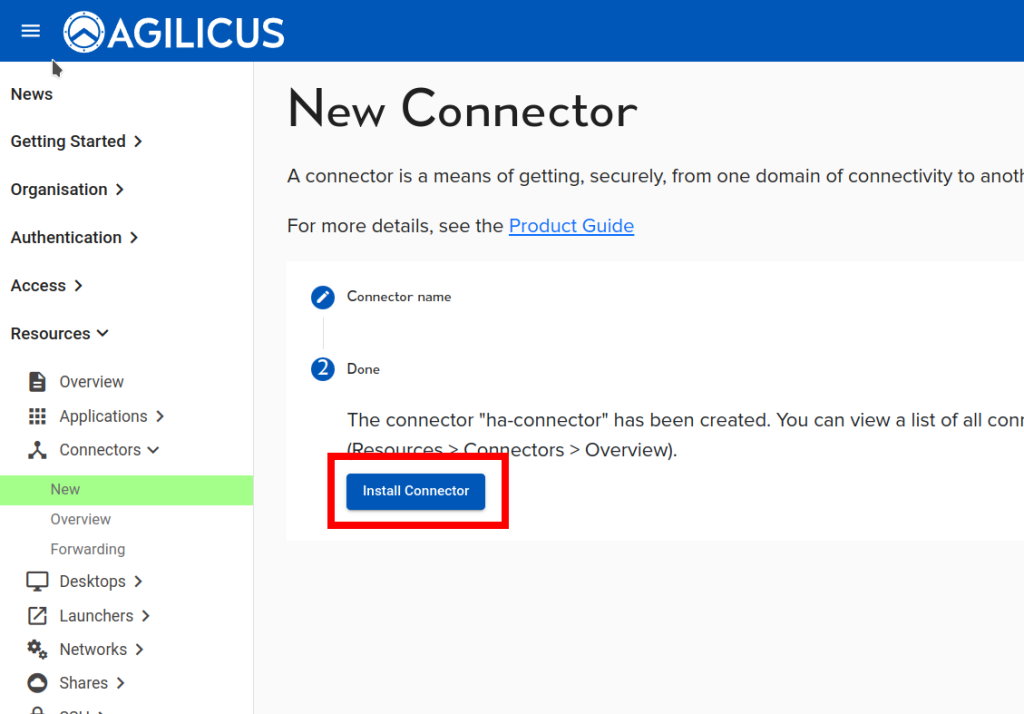
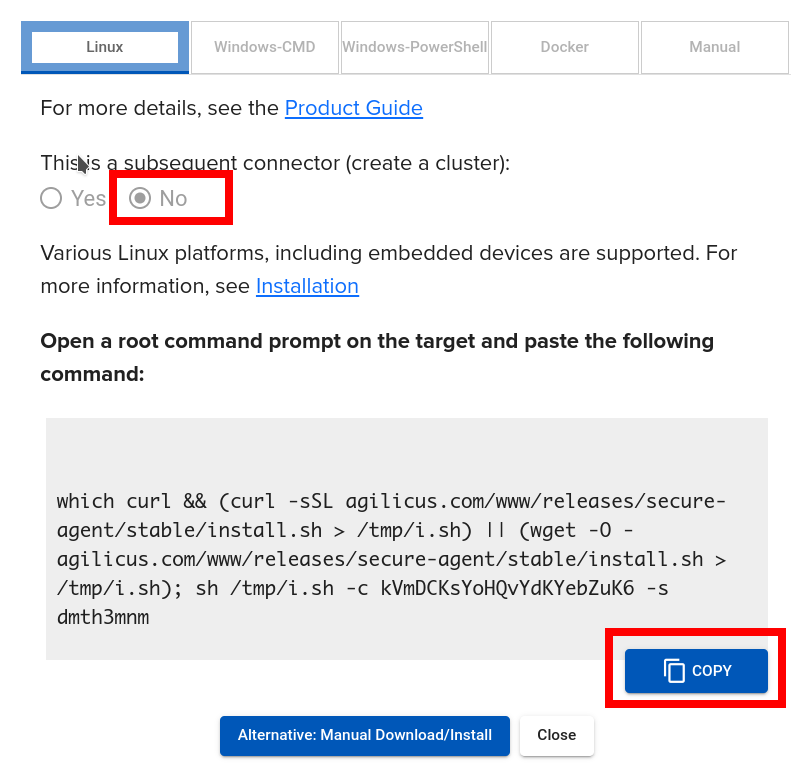
The installation instructions for the first connector in a high availability set are the same as for non high-availability.
At this stage, the first connector is installed. Ensure it transitions to “GOOD” since it must be up and running to join the other connectors to the cluster.
Adding High Availability Peers (Subsequent Connectors)
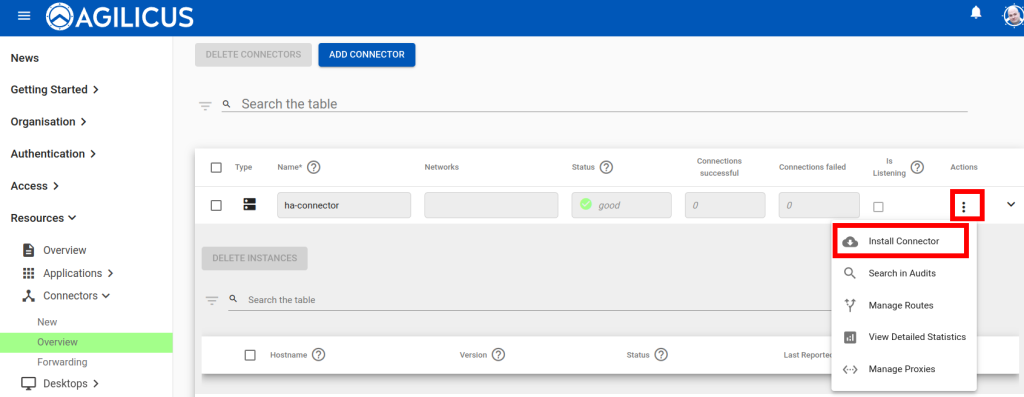
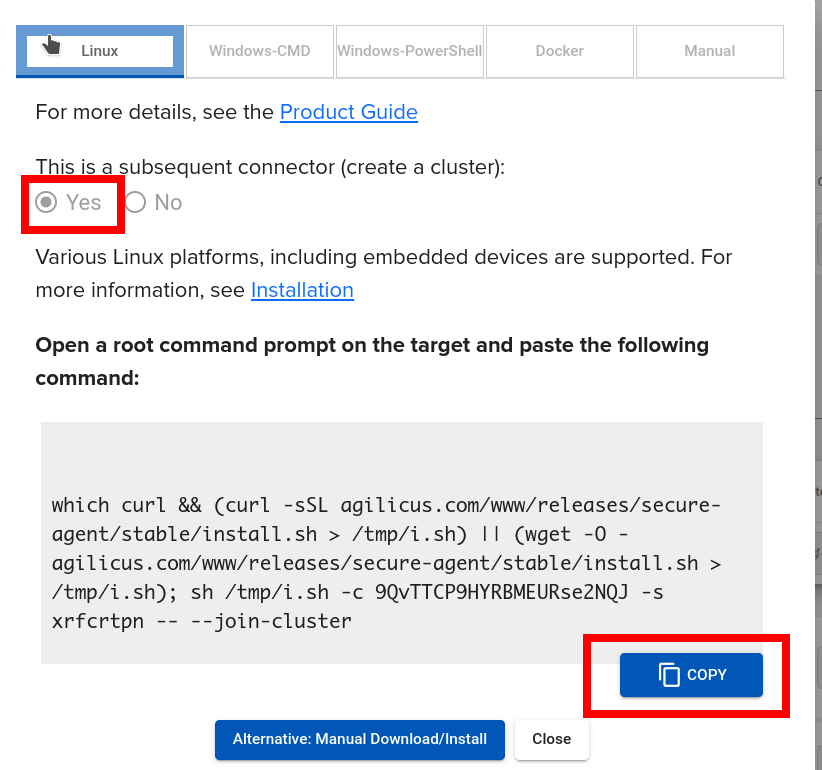
To add additional high-availability peers, simply use the ‘Actions/Install Connector’ option on the first instance we created above.
At this stage we are done, and there are two connectors running in High Availability mode. Note the slight difference in the output of the installation at the end (“Joining existing cluster. This will fail if another connector in this cluster is not online“)
INFO[2024-04-01T11:55:38-04:00] Starting connector - version v0.246.9
INFO[2024-04-01T11:55:39-04:00] Check if the agilicus connector is already running as a service. If so stop it
INFO[2024-04-01T11:55:39-04:00] Create file /usr/bin/agilicus-agent-wrapper.sh
INFO[2024-04-01T11:55:39-04:00] Create file /etc/systemd/system/agilicus-agent.service
INFO[2024-04-01T11:55:39-04:00] Will install to /agilicus-agent.service -> {/etc/systemd/system/agilicus-agent.service -r--r--r-- 0x14cf980}
INFO[2024-04-01T11:55:39-04:00] Will install to /agilicus-agent-wrapper.sh -> {/usr/bin/agilicus-agent-wrapper.sh -rwxr-xr-x <nil>}
INFO[2024-04-01T11:55:39-04:00] Create a directory at /opt/agilicus/agent/tufmetadata/latest
INFO[2024-04-01T11:55:39-04:00] Create a directory at /opt/agilicus/agent/tufmetadata/stable
INFO[2024-04-01T11:55:40-04:00] Create a user and group named Agilicus to run the agilicus-agent service
INFO[2024-04-01T11:55:40-04:00] Copy executable to /opt/agilicus/agent
INFO[2024-04-01T11:55:40-04:00] Set permissions to Agilicus on /opt/agilicus/agent
INFO[2024-04-01T11:55:40-04:00] Create symlink from /usr/bin/agilicus-agent to /opt/agilicus/agent/agilicus-agent
INFO[2024-04-01T11:55:41-04:00] creating connector instance
INFO[2024-04-01T11:55:41-04:00] Join a connector cluster
INFO[2024-04-01T11:55:41-04:00] Joining existing cluster. This will fail if another connector in this cluster is not online
INFO[2024-04-01T11:56:01-04:00] Start agilicus-agent service