Overview
An Application may be hosted in the Agilicus platform, or external. For this example we are going to show how to develop a new application, initially not hosted. For steps we will need:
- Authentication Client (OpenID Connect client id)
- Application (to attach permissions to, externally hosted)
- Create group, assign users to it
Application Setup
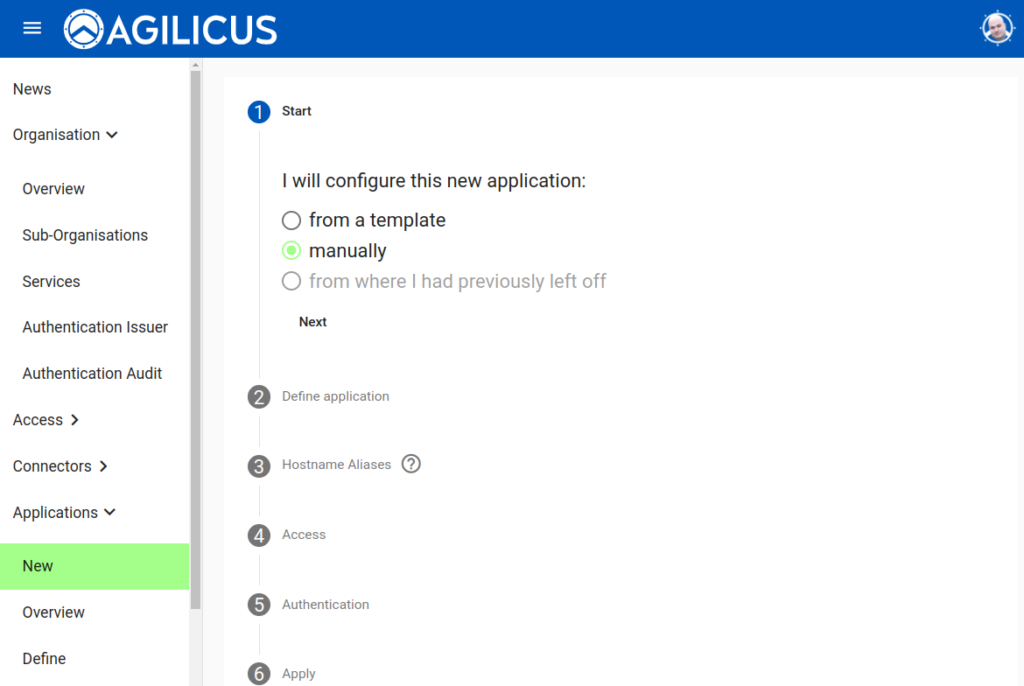
We can do the first two steps aove in a single step with the “New Application” configuration. First, under the Application menu, select ‘New’. Select ‘manually’.
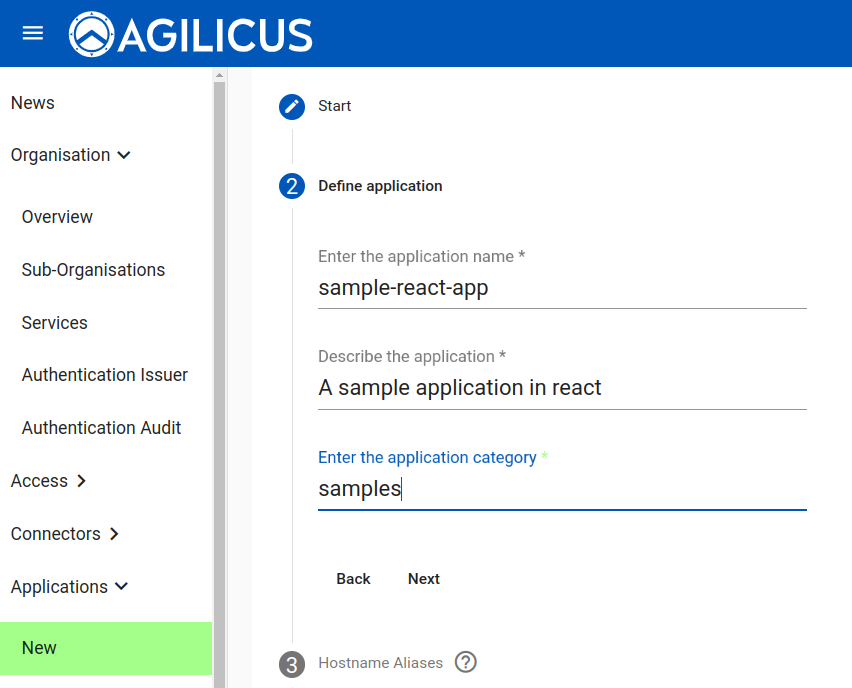
Now we give the application a name. The name will eventually be part of the URL (as a hostname) so keep it a single word. We add a description (which end users will see in the catalog), and a category (which will be used for grouping in reports).
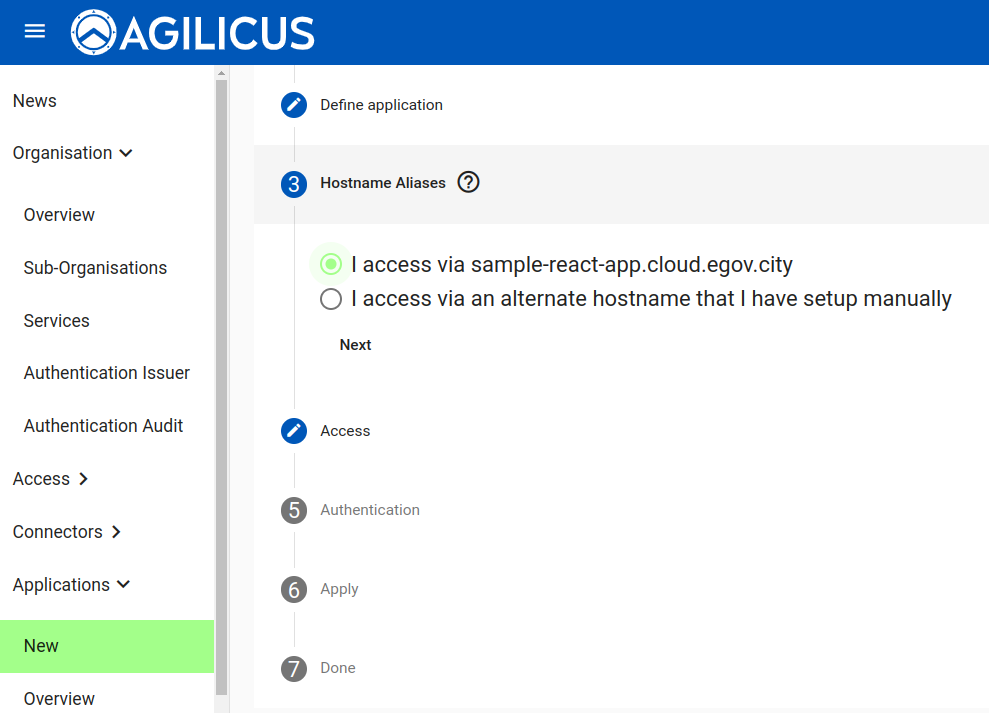
We now indicate how we will ultimately access this application. Since it is (currently) external, this does not matter, leave the top item checked. Later when we move it to be hosted this will become a URL.
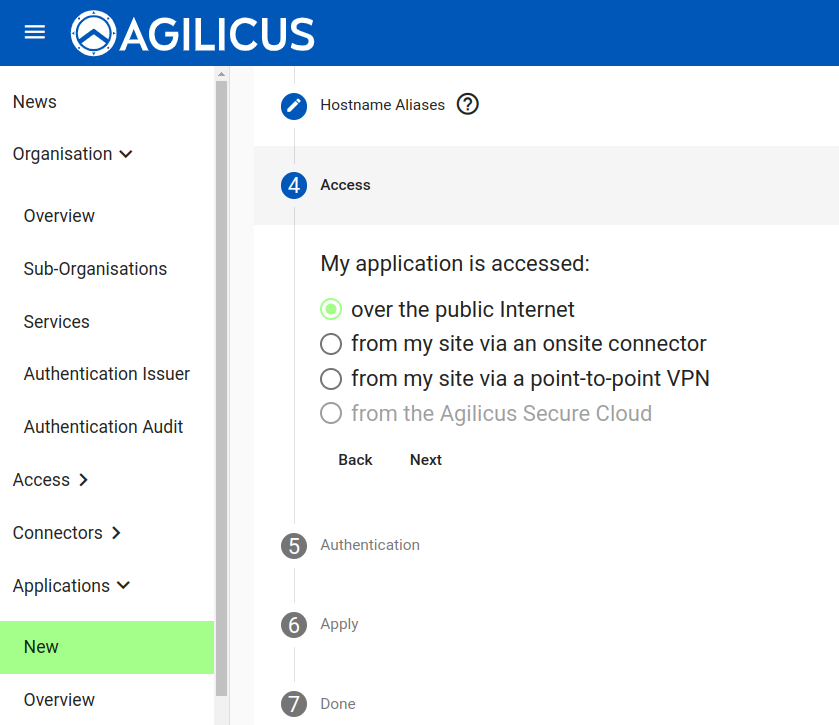
Now we indicate how the user accesses the application. Since we are just developing it, and it is on our desktop, leave this as “over the public Internet” (e.g. the application is not hosted in or through the Agilicus platform for the data path).
We now indicate that our application will participate in the authentication. This means that it has a built-in library handling OpenID Connect.
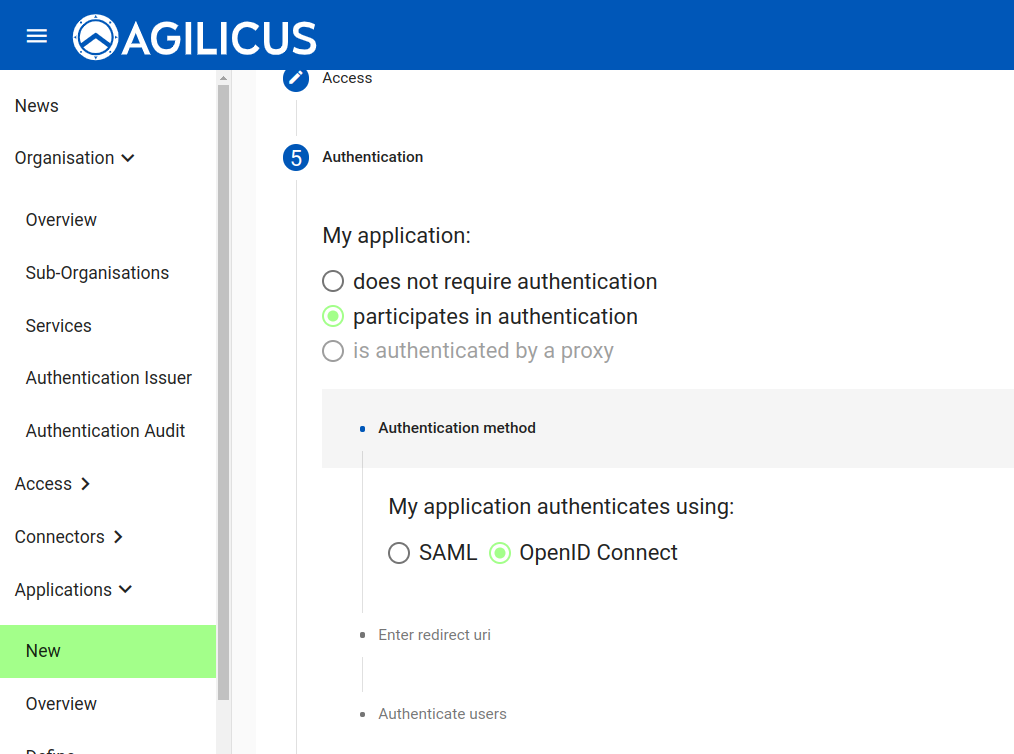
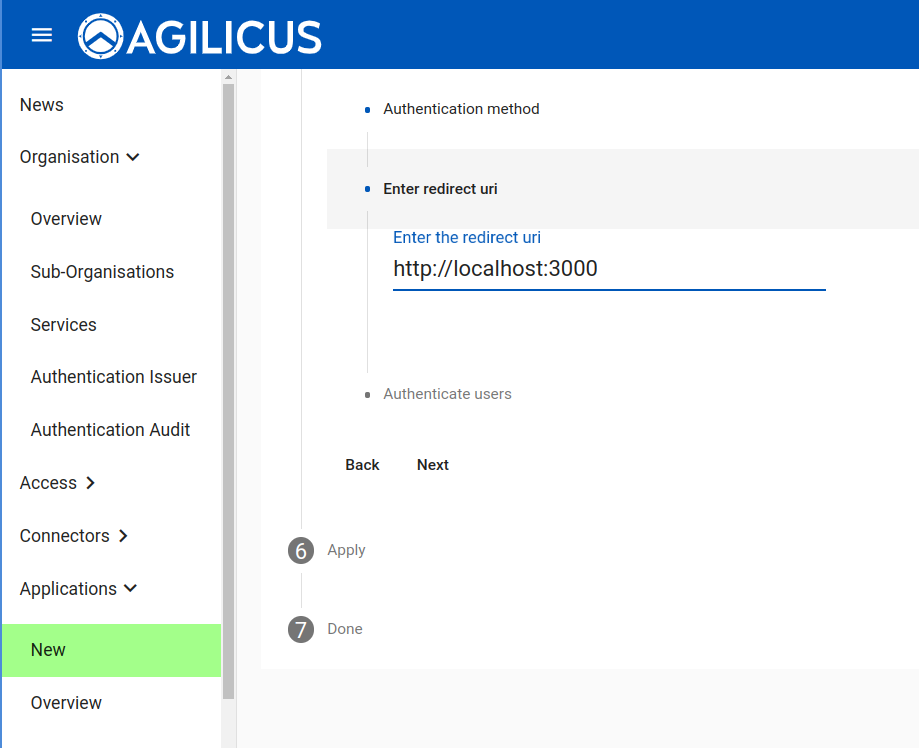
We must now configure the redirect URI (which is part of the OpenID Connect specification). Here we will use http://localhost:3000/ since we are hosting this on our desktop. Later we will add the production redirect URI in the Authentication Client.
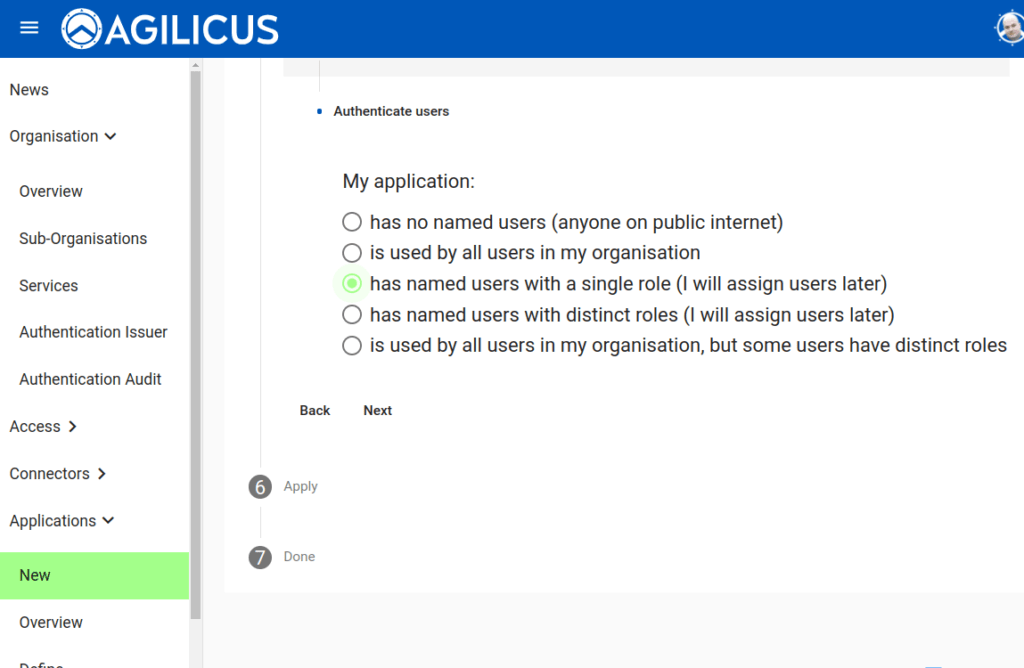
We must now indicate how users are granted access. If we say “is used by all users in my organisation”, this means that the “All users” group will be granted access.
If we say “has named users with a single role”, this means authorisation is Boolean (allow/deny), but for a named set of users. We will use this option for the sample.
If our application has distinct roles for the users (e.g. Admin, Editor, Viewer), we can use the “has named users with distinct roles”.
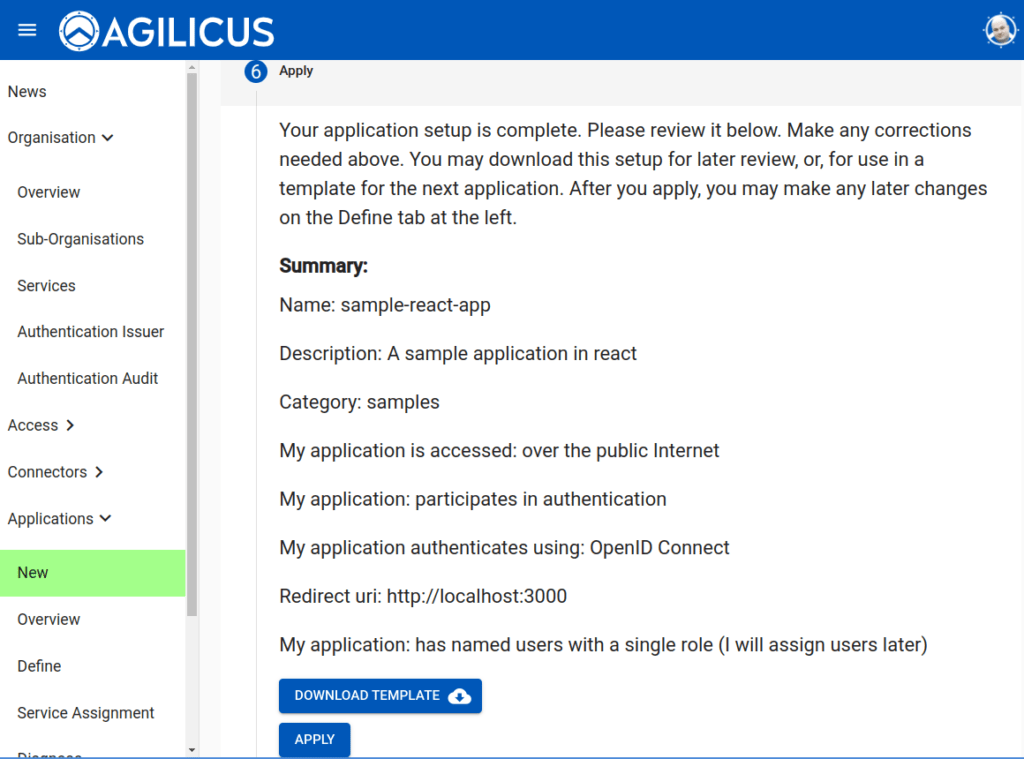
Now we are complete, we will hit apply.
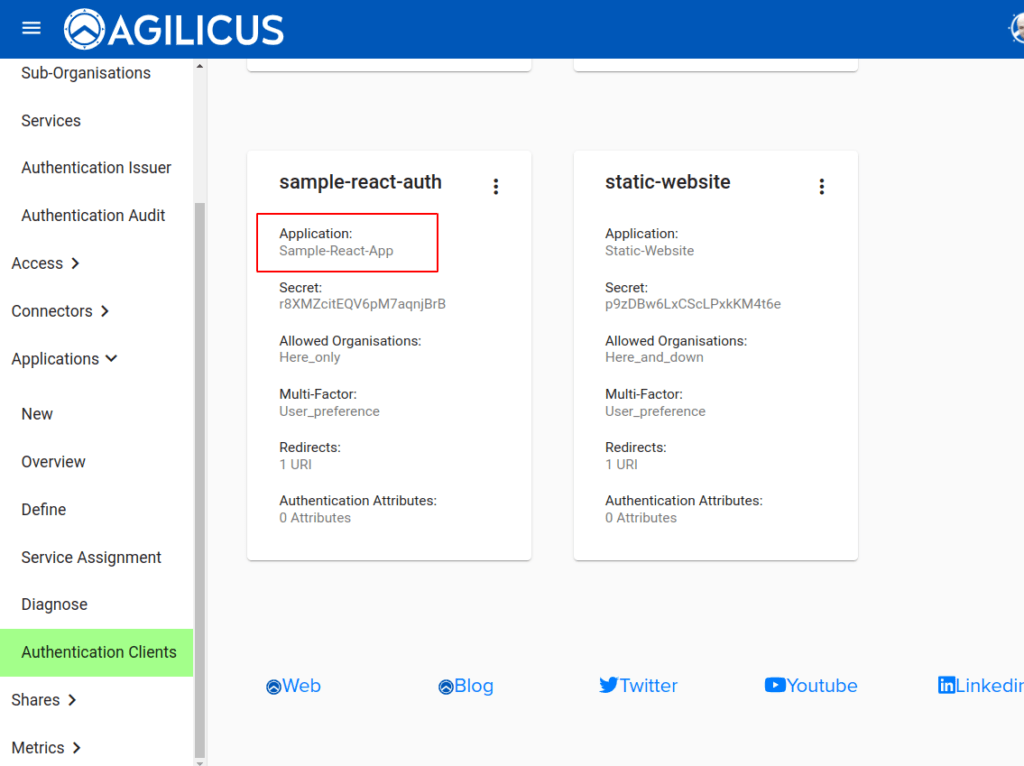
We can inspect the Authentication Client created. Later when we change the redirect URI we can change it here.
At this time we will change the application allowed from ‘All’ to ‘Sample-React-App’, forcing it to only allow our new application.
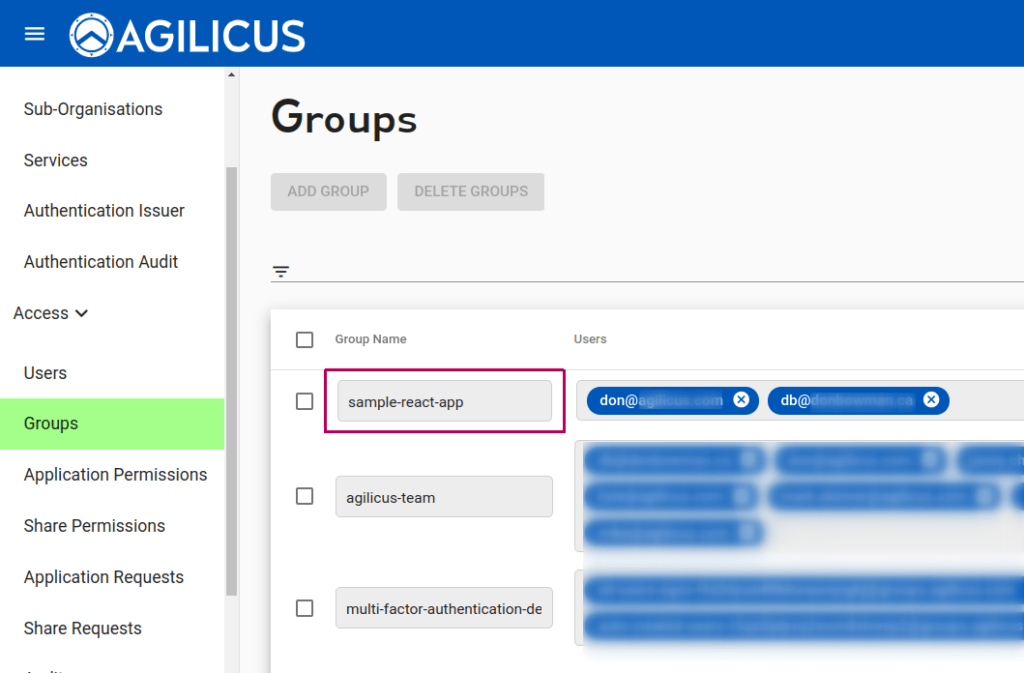
Group Create, Permissions Assign
Create a new group. Assign yourself (and any other users)
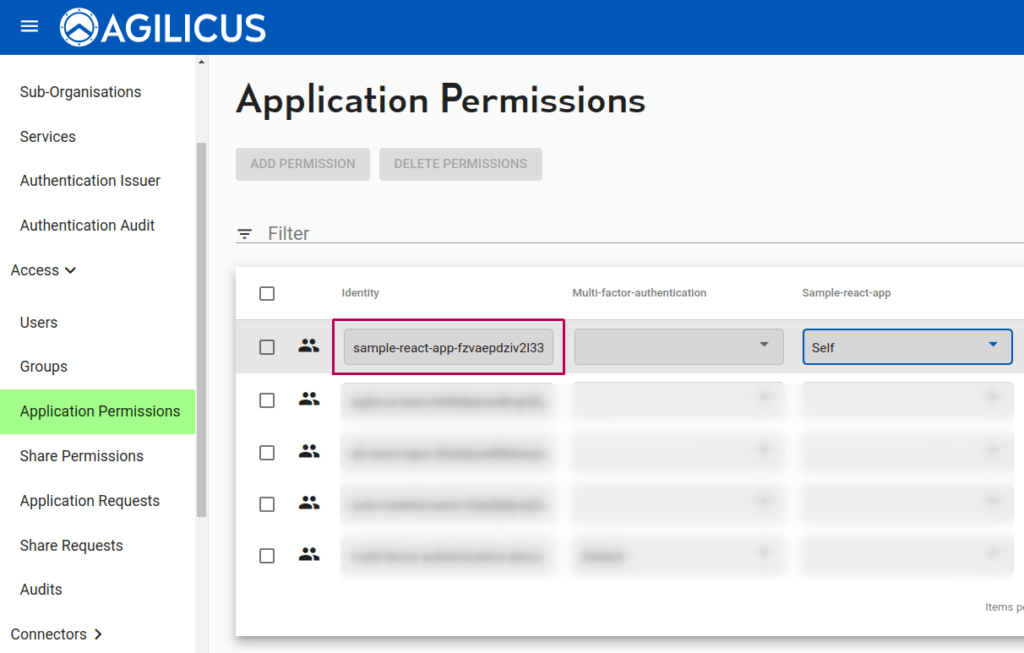
Now, create a new row in the “Application Permissions”, add the new group, and assign ‘Self’ as a permission to the application column.
Sample Code
See github repo for a sample using react-openidconnect library.
import React, {Component} from 'react';
import Authenticate from 'react-openidconnect';

import logo from './logo.svg';
import './App.css';

var OidcSettings = {
  authority: 'https://auth.cloud.egov.city/',
  client_id: 'sample-react-auth',
  redirect_uri: 'http://localhost:3000/',
  response_type: 'id_token token code',
  scope: 'openid profile email',
  post_logout_redirect_uri: 'https://localhost:3000/',
};

class App extends Component {
  constructor(props) {
    super(props);
    this.user = 'unknown';
    this.userLoaded = this.userLoaded.bind(this);
    this.userUnLoaded = this.userUnLoaded.bind(this);

    this.state = {user: undefined};
  }

  userLoaded(user) {
    if (user) {
      this.user = user;
      console.log(user);
      this.setState({user: user});
    }
  }

  userUnLoaded() {
    this.user = 'unknown';
    this.setState({user: undefined});
  }

  NotAuthenticated() {
    return (
      <div className="App">
        <header className="App-header">
          <img src={logo} className="App-logo" alt="logo" />
          <p> Click to authenticate </p>
        </header>
      </div>
    );
  }

  render() {
    return (
      <Authenticate
        OidcSettings={OidcSettings}
        userLoaded={this.userLoaded}
        userunLoaded={this.userUnLoaded}
        renderNotAuthenticated={this.NotAuthenticated}
      >
      `<div className="App">
        <header className="App-header">
          <img src={logo} className="App-logo" alt="logo" />
          <p> Welcome User! {this.user} </p>
        </header>
      </div>`
      </Authenticate>
    );
  }
}

export default App;
Want Assistance?
The Agilicus team is here for you. The ‘Chat‘ icon in the lower left, here, or in the administrative web page, goes to our team.
Or, feel free to email support@agilicus.com
Not yet a customer? The TRY NOW button will walk you through the process.