AnyX Guide Topic: desktop

  • Rockwell Automation PanelView VNC

    Rockwell Automation PanelView VNC

    e3e64e1a rockwell panelview

    Rockwell Automation PanelView VNC

    Rockwell Automation’s Allen-Bradley PanelView Graphic Terminals provide rugged Human Machine Interface (HMI) in an industrial setting. These terminals support VNC for remote access.

    Learn how to making VNC remotely available, simply, securely, without port-forwards, VPNs, or complex firewalls using Agilicus AnyX.

    Rockwell Automation PanelView VNC Overview

    Rockwell Automation PanelView devices offer industrial-hardened Human Machine Interfaces (HMI). These may be used for viewing process status & alarms, or for input/control.

    A common requirement is to have remote operations view (or interact) with the HMI. The PanelView devices support VNC, meaning its possible, but the network security of VNC is very poor. Absent a product like Agilicus AnyX, plants often use port-forward, DMZ, VPN access, putting themselves at risk.

    In this example using Agilicus AnyX, we will show how to safely, securely, simply use Rockwell Automation PanelView devices from a remote network, assigning permissions to individual users with single-sign-on, optional with multi-factor authentication, without modifying the local firewall config. Agilicus AnyX can perform password stuffing in VNC, meaning there is no need to share the password with the individual operators.

    Installation Instructions

    Overview

    If you have not already, sign up for Agilicus AnyX. In the below instructions, we will refer to _ _MYDOMAIN_ _, this is the domain you chose during the Agilicus AnyX sign up process. If you have navigated to this page from the Agilicus admin console (https://admin.__MYDOMAIN__), this will be filled in automatically.

    Once setup, the data flow will be as shown to the right. The user will have either web-based access, or, desktop client access to each HMI. They will sign in with their natural corporate credentials (regardless of whether directly employed by the Plant or being a 3rd-party contractor providing remote operations). The will see the HMI directly, no client software is required, no changes are needed on the firewall.

    Concepts

    Agilicus Connector: this software installs as a service on some device in your network. It can support multiple operating systems. Each connector can support an arbitrary number of resources (web applications, shares, VNC, RDP, etc.). In general you need one connector per site.

    Authentication: attesting you are who you say you are. Agilicus AnyX uses OpenID Connect, and supports zero-config of Microsoft, Google, Yahoo, Linkedin, or, you can configure your own such as Okta.

    Identity: who you are. This is external to the Agilicus AnyX system.

    Resource: an individually accessible and permissionable endpoint. In this example, VNC

    Permission: assigning a role and access rules per person<->resource pair.

    1. Install Connector

    For details see Agilicus Connector.

    In this example, we are assuming you will install the Connector on a machine on the same network as the PanelView HMI. It needs to have access to port 5900 on the HMI.

    Select the appropriate tab for your Operating System.

    Navigate to the admin console (https://admin.__MYDOMAIN__). Sign in with the credentials you used during sign up. Select resoures/connectors/new, and give the new connector a name (here we are using ‘openwebui’). Select ‘Install Connector’.

    In the dialog that comes up, select Linux at the top, and then copy the command line. Paste this into a root shell.

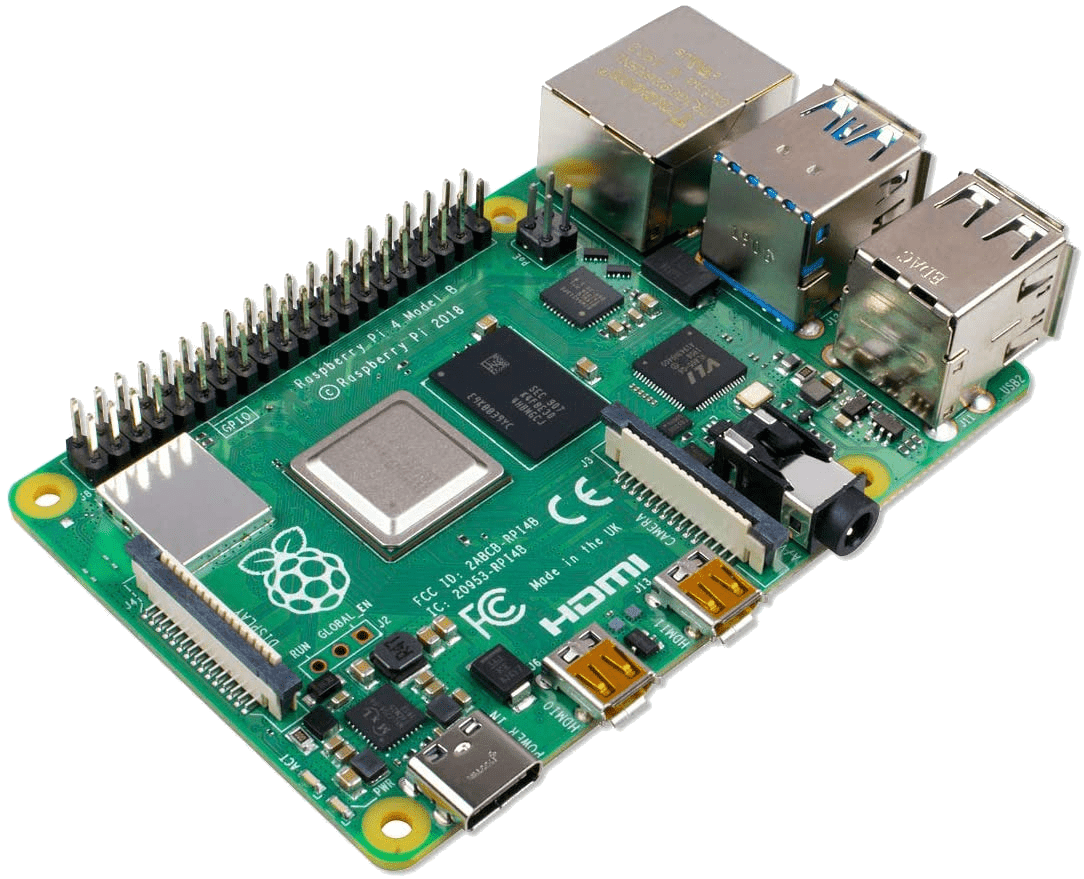
    Depending on your Linux distribution, this will install a service with systemd, upstart, init.d, etc. These instructions should also work on embedded devices (e.g. Raspberry pi).

    When complete, the dialog should dismiss itself. We can now check the connector status in Resources/Connectors/Overview, and see it will go ‘good’.

    If the connector doesn’t come online, check that the service is running and check for any errors in its log. Common errors include:

    1. NTP / timesync is not setup
    2. Outbound firewall prevents connections to port 443 (the Connector can support MITM proxies in corporate environments if needed)

    (For more details, see Agilicus Connector – Microsoft Windows)

    Navigate to the admin console (https://admin.__MYDOMAIN__). Sign in with the credentials you used during sign up. Select resoures/connectors/new, and give the new connector a name (here we are using ‘openwebui’). Select ‘Install Connector’.

    In the dialog that comes up, select Windows-CMD at the top, and then copy the command line. Paste this into an Administrator cmd interface (e.g. on start menu, type ‘cmd’, and then select ‘Administrative shell’ on the right).

    When complete, the dialog should dismiss itself. We can now check the connector status in Resources/Connectors/Overview, and see it will go ‘good’.

    If the connector doesn’t come online, check that the service is running and check for any errors in eventvwr. Common errors include:

    1. NTP / timesync is not setup
    2. Outbound firewall prevents connections to port 443 (the Connector can support MITM proxies in corporate environments if needed)
    2. Create PanelView VNC Resource

    In this example we assume you already have the PanelView device running and VNC enabled on it with either a ‘View Only’ or a ‘Control’ password.

    In our sample network, the HMI is called ‘PV800T4T’ and has an IP of 172.16.0.247 (please either use a name and ensure your DNS resolves it, or, disable DHCP on the HMI and use a static IP.

    Follow the images below, ‘Resources/Desktops/New’, create a new desktop, give it a name. For the optional component about password stuffing, you can ignore in which case the user must enter a 2nd VNC password each time. Or, you can enter the View Only and/or Control password. If you do this, the end user will not be aware of the password.

    Assign permissions to yourself to test.

    Once configured, navigate to https://profile.__MYDOMAIN__, you may need to hit refresh, but you should now see an icon for the new VNC. You can open this directly in the browser, or, if you choose, install the desktop integration and click it to open the native client.

    3. Add a second user (optional)

    We can now add a second user to share. Enter their email address (this must match that given by the Identity Provider, e.g. user@gmail, user@outlook.com, user@google-workspace-domain, user@office365-domain etc.

    Now, add permissions to the user. If you have a lot of applications or a lot of users, consider using Groups.

  • Using Remote Desktop Gateway through a Launcher

    Using Remote Desktop Gateway through a Launcher

    remote-desktop-style

    Exposing a Remote Desktop Gateway through a Launcher

    This guide will walk you through configuring your machine to access desktops using a Remote Desktop gateway via an Agilicus Connector.

    NOTE: This is an unusual setup, normally you use the Desktop feature of Agilicus directly without Microsoft RD Web.

    Overview

    This guide will walk you through configuring your machine to access desktops using a Remote Desktop gateway via an Agilicus Connector. This allows you to use Microsoft Remote Desktop Gateway on a hidden internal network without opening a firewall rule or port-forward or VPN.

    This technique involves creating a network to represent Remote Desktop Services then creating a launcher which will open mstsc.exe such that it will proxy all requests to the Remote Desktop gateway through Agilicus. Only users with permission to the launcher will have access to the Remote Desktop gateway. The .rdp extension will be associated with the launcher so that opening the file after downloading it from the RD Web portal will invoke the launcher, allowing it to properly access the Remote Desktop gateway. Users can download the RDP files from the normal RD Web portal, protected by Agilicus, using an Application you configure.

    Configuring the Launcher

    Create a resource group called ts-gateways. Then create a network called ts-gateway-1. Add it to the
    ts-gateways resource group.

    Note: if you have multiple gateways, repeat this process for each. Increment the -1 (e.g. ts-gateway-2,
    ts-gateway-3). This naming scheme is just an example; you can use your own to match your
    organisation’s naming scheme.

    Next, create a launcher called ts-launch, pointing to C:\Windows\system32\mstsc.exe, containing the ts-gateways resource
    group. Give yourself and any others you want ‘owner’ permission to it.

    Under “Advanced configuration”, select “My launcher has additional options” and then check “My
    launcher requires DNS (name service) interception” and “Hide the launcher command window”. Select
    “No” for “My application requires multiple processes”

    Configuring the Client Desktop

    Here we ensure the launcher is present on the desktop, and configure the desktop via the registry to point RDP files to the launcher.

    If the launcher is not installed, do so now. Otherwise, run the Agilicus Refresh tool to install the new launcher shortcut. From that we’ll find two pieces of information needed to populate some registry entries. Navigate to the Agilicus\Launchers Start Menu entry and edit the properties of the shortcut. We’re interested in the “Target” field.

    Note down the strings after –launcher id and –org-id. In my case:

    C:\Users\Kyle\AppData\Local\Agilicus\Agent\agilicus-agent.exe proxify --cfg-file
    C:\Users\Kyle\AppData\Local\Agilicus\Agent\agent.conf.enc.yaml --launcher-id
    epQEX8vj9wdo8B4iYcCTPT --org-id 82ooVE34kQtyq3kJkSVhAz --no-console

    From which I extract:

    • launcher-id: epQEX8vj9wdo8B4iYcCTPT
    • org-id: 82ooVE34kQtyq3kJkSVhAz

    Next, import the registry template by loading the following rdp-launcher-template.rdp file and answering
    yes. This will insert registry entries controlling the default assocation for rdp files. You will then modify
    the added entries to point to the launcher you configured earlier.

    Windows Registry Editor Version 5.00
    [HKEY_CURRENT_USER\Software\Classes\RDP.File]
    @="Remote Desktop Connection"
    "AppUserModelId"="Microsoft.Windows.RemoteDesktop"
    "EditFlags"=dword:00100000
    "FriendlyTypeName"=hex(2):40,00,25,00,73,00,79,00,73,00,74,00,65,00,6d,00,72
    ,\
    00,6f,00,6f,00,74,00,25,00,5c,00,73,00,79,00,73,00,74,00,65,00,6d,00,33,00,\
    32,00,5c,00,6d,00,73,00,74,00,73,00,63,00,2e,00,65,00,78,00,65,00,2c,00,2d,\
    00,34,00,30,00,30,00,34,00,00,00
    [HKEY_CURRENT_USER\Software\Classes\RDP.File\DefaultIcon]
    @=hex(2):25,00,73,00,79,00,73,00,74,00,65,00,6d,00,72,00,6f,00,6f,00,74,00,2
    5,\
    00,5c,00,73,00,79,00,73,00,74,00,65,00,6d,00,33,00,32,00,5c,00,6d,00,73,00,\
    74,00,73,00,63,00,2e,00,65,00,78,00,65,00,00,00
    [HKEY_CURRENT_USER\Software\Classes\RDP.File\shell]
    @="Connect"
    [HKEY_CURRENT_USER\Software\Classes\RDP.File\shell\Connect]
    @="Connect"
    "MUIVerb"=hex(2):40,00,25,00,73,00,79,00,73,00,74,00,65,00,6d,00,72,00,6f,00
    ,\
    6f,00,74,00,25,00,5c,00,73,00,79,00,73,00,74,00,65,00,6d,00,33,00,32,00,5c,\
    00,6d,00,73,00,74,00,73,00,63,00,2e,00,65,00,78,00,65,00,2c,00,2d,00,34,00,\
    30,00,30,00,32,00,00,00
    [HKEY_CURRENT_USER\Software\Classes\RDP.File\shell\Connect\command]@=hex(2):22,00,25,00,6c,00,6f,00,63,00,61,00,6c,00,61,00,70,00,70,00,64,00,6
    1,\
    00,74,00,61,00,25,00,5c,00,41,00,67,00,69,00,6c,00,69,00,63,00,75,00,73,00,\
    5c,00,41,00,67,00,65,00,6e,00,74,00,5c,00,61,00,67,00,69,00,6c,00,69,00,63,\
    00,75,00,73,00,2d,00,61,00,67,00,65,00,6e,00,74,00,2e,00,65,00,78,00,65,00,\
    22,00,20,00,70,00,72,00,6f,00,78,00,69,00,66,00,79,00,20,00,2d,00,2d,00,63,\
    00,66,00,67,00,2d,00,66,00,69,00,6c,00,65,00,20,00,22,00,25,00,6c,00,6f,00,\
    63,00,61,00,6c,00,61,00,70,00,70,00,64,00,61,00,74,00,61,00,25,00,5c,00,41,\
    00,67,00,69,00,6c,00,69,00,63,00,75,00,73,00,5c,00,41,00,67,00,65,00,6e,00,\
    74,00,5c,00,61,00,67,00,65,00,6e,00,74,00,2e,00,63,00,6f,00,6e,00,66,00,2e,\
    00,65,00,6e,00,63,00,2e,00,79,00,61,00,6d,00,6c,00,22,00,20,00,2d,00,2d,00,\
    6c,00,61,00,75,00,6e,00,63,00,68,00,65,00,72,00,2d,00,69,00,64,00,20,00,3c,\
    00,79,00,6f,00,75,00,72,00,5f,00,6c,00,61,00,75,00,6e,00,63,00,68,00,65,00,\
    72,00,5f,00,69,00,64,00,3e,00,20,00,2d,00,2d,00,6f,00,72,00,67,00,2d,00,69,\
    00,64,00,20,00,3c,00,79,00,6f,00,75,00,72,00,5f,00,6f,00,72,00,67,00,5f,00,\
    69,00,64,00,3e,00,20,00,2d,00,2d,00,6e,00,6f,00,2d,00,63,00,6f,00,6e,00,73,\
    00,6f,00,6c,00,65,00,20,00,2d,00,2d,00,20,00,22,00,25,00,31,00,22,00,00,00
    [HKEY_CURRENT_USER\Software\Classes\RDP.File\shell\Edit]
    @="Edit"
    "MUIVerb"=hex(2):40,00,25,00,73,00,79,00,73,00,74,00,65,00,6d,00,72,00,6f,00
    ,\
    6f,00,74,00,25,00,5c,00,73,00,79,00,73,00,74,00,65,00,6d,00,33,00,32,00,5c,\
    00,6d,00,73,00,74,00,73,00,63,00,2e,00,65,00,78,00,65,00,2c,00,2d,00,34,00,\
    30,00,30,00,33,00,00,00
    [HKEY_CURRENT_USER\Software\Classes\RDP.File\shell\Edit\command]@=hex(2):22,00,25,00,6c,00,6f,00,63,00,61,00,6c,00,61,00,70,00,70,00,64,00,6
    1,\
    00,74,00,61,00,25,00,5c,00,41,00,67,00,69,00,6c,00,69,00,63,00,75,00,73,00,\
    5c,00,41,00,67,00,65,00,6e,00,74,00,5c,00,61,00,67,00,69,00,6c,00,69,00,63,\
    00,75,00,73,00,2d,00,61,00,67,00,65,00,6e,00,74,00,2e,00,65,00,78,00,65,00,\
    22,00,20,00,70,00,72,00,6f,00,78,00,69,00,66,00,79,00,20,00,2d,00,2d,00,63,\
    00,66,00,67,00,2d,00,66,00,69,00,6c,00,65,00,20,00,22,00,25,00,6c,00,6f,00,\
    63,00,61,00,6c,00,61,00,70,00,70,00,64,00,61,00,74,00,61,00,25,00,5c,00,41,\
    00,67,00,69,00,6c,00,69,00,63,00,75,00,73,00,5c,00,41,00,67,00,65,00,6e,00,\
    74,00,5c,00,61,00,67,00,65,00,6e,00,74,00,2e,00,63,00,6f,00,6e,00,66,00,2e,\
    00,65,00,6e,00,63,00,2e,00,79,00,61,00,6d,00,6c,00,22,00,20,00,2d,00,2d,00,\
    6c,00,61,00,75,00,6e,00,63,00,68,00,65,00,72,00,2d,00,69,00,64,00,20,00,3c,\
    00,79,00,6f,00,75,00,72,00,5f,00,6c,00,61,00,75,00,6e,00,63,00,68,00,65,00,\
    72,00,5f,00,69,00,64,00,3e,00,20,00,2d,00,2d,00,6f,00,72,00,67,00,2d,00,69,\
    00,64,00,20,00,3c,00,79,00,6f,00,75,00,72,00,5f,00,6f,00,72,00,67,00,5f,00,\
    69,00,64,00,3e,00,20,00,2d,00,2d,00,6e,00,6f,00,2d,00,63,00,6f,00,6e,00,73,\
    00,6f,00,6c,00,65,00,20,00,2d,00,2d,00,20,00,2d,00,65,00,64,00,69,00,74,00,\
    20,00,22,00,25,00,31,00,22,00,00,00
    [HKEY_CURRENT_USER\Software\Classes\RDP.File\shell\Open]
    "Extended"=""
    [HKEY_CURRENT_USER\Software\Classes\RDP.File\shell\Open\command]
    @=hex(2):22,00,25,00,6c,00,6f,00,63,00,61,00,6c,00,61,00,70,00,70,00,64,00,6
    1,\
    00,74,00,61,00,25,00,5c,00,41,00,67,00,69,00,6c,00,69,00,63,00,75,00,73,00,\5c,00,41,00,67,00,65,00,6e,00,74,00,5c,00,61,00,67,00,69,00,6c,00,69,00,63,\
    00,75,00,73,00,2d,00,61,00,67,00,65,00,6e,00,74,00,2e,00,65,00,78,00,65,00,\
    22,00,20,00,70,00,72,00,6f,00,78,00,69,00,66,00,79,00,20,00,2d,00,2d,00,63,\
    00,66,00,67,00,2d,00,66,00,69,00,6c,00,65,00,20,00,22,00,25,00,6c,00,6f,00,\
    63,00,61,00,6c,00,61,00,70,00,70,00,64,00,61,00,74,00,61,00,25,00,5c,00,41,\
    00,67,00,69,00,6c,00,69,00,63,00,75,00,73,00,5c,00,41,00,67,00,65,00,6e,00,\
    74,00,5c,00,61,00,67,00,65,00,6e,00,74,00,2e,00,63,00,6f,00,6e,00,66,00,2e,\
    00,65,00,6e,00,63,00,2e,00,79,00,61,00,6d,00,6c,00,22,00,20,00,2d,00,2d,00,\
    6c,00,61,00,75,00,6e,00,63,00,68,00,65,00,72,00,2d,00,69,00,64,00,20,00,3c,\
    00,79,00,6f,00,75,00,72,00,5f,00,6c,00,61,00,75,00,6e,00,63,00,68,00,65,00,\
    72,00,5f,00,69,00,64,00,3e,00,20,00,2d,00,2d,00,6f,00,72,00,67,00,2d,00,69,\
    00,64,00,20,00,3c,00,79,00,6f,00,75,00,72,00,5f,00,6f,00,72,00,67,00,5f,00,\
    69,00,64,00,3e,00,20,00,2d,00,2d,00,6e,00,6f,00,2d,00,63,00,6f,00,6e,00,73,\
    00,6f,00,6c,00,65,00,20,00,2d,00,2d,00,20,00,22,00,25,00,31,00,22,00,00,00

    After importing the registry template, open regedit.exe. and navigate to
    Computer\HKEY_CURRENT_USER\Software\Classes\RDP.File

    Proceed to edit the Default value in each of Connect\command, Edit\command and Open\command,
    replacing <your_launcher_id> with the launcher-id you noted earlier, and <your_org_id> with the
    org-id you noted earlier.

    For example, consider the following Connect key:

    Turns into:

    With this in place, RDP files will by default invoke the launcher, which will in turn invoke mstsc.exe.

    Configuring the RD Web Access

    In order to grant access to the RD Web Access portal, you will create an application in Agilicus. Create
    an application called ts-gateway. Again, this name is just an example. You can call the application
    something meaningful to your organisation.


    Under access, point it at your Remote Desktop Services gateway’s web portal from a connector with access to it.
    Select “Service is accessed via TLS and verify” for the TLS type.

    Under Authentication, choose:

    • is authenticated by a proxy
    • for redirect after signin path, enter the aboslute path of landing page of the gateway. E.g. /RDWeb/Pages/en-US/Default.aspx
    • Do not choose “My application is also launched from the desktop”

    Now apply the application:

    Navigate to the application’s definition. Under Security, scroll to “Firewall Rules”. Modify the / rule to be ^/RDWeb/

    Then navigate to the Proxy Tab. Open up the HTTP Rewrites panel, and then the Rewrite Media Types
    panel. In there, add two media types:

    • application/json
    • application/x-rdp

    Set the “Common Path Prefix” to /RDWeb/Pages/en-US/Default.aspx

    Then, scroll down to the Rewrite Rules. Add the following mapping:

    • Internal Name: workspace id:s:
    • External Name: agilicus workspace id:s:

    Next, create a group called “ts-gateway-users”, and add any users you would like to have access:

    Under Application Permissions, assign the ‘self’ role to the ts-gateway-users group.

    Using the RD Web Portal

    You can now access the portal from the ts-gateway. URL. You can also launch this
    from profile. E.g. If you have multiple gateways, repeat this process for each, giving them a unique and descriptive name
    (so that your users can choose the correct one).

    Prior to displaying the main page, you will be required to log in to Agilicus to gain access. Opening the downloaded RDP file will cause it to launch the Launcher you previously configured, which will then allow the user to access the otherwise inaccessible gateway.

  • Real VNC & Raspberry Pi

    Real VNC & Raspberry Pi

    ae2c7d35 raspberry pi

    Real VNC & Raspberry Pi

    How to setup Real VNC to interoperate with standard VNC on your Raspberry Pi.

    Real VNC & Raspberry Pi

    The Raspberry PI supports multiple operating system distributions. The default used is often Raspbian, which has a VNC-similar server installed called Real VNC.

    Real VNC is not enabled by default. It also uses a proprietary authentication scheme by default.

    To enable VNC on your Raspberry Pi and access via Agilicus Any-X, you may use the option panel, changing the Authentication from “Unix password” to “VNC password”. Or, if you prefer, you may edit the text files as below.

    1. Add Authentication=VncAuth to /root/.vnc/config.d/vncserver-x11
    # cat /root/.vnc/config.d/vncserver-x11
    _AnlLastConnTime=int64:0000000000000000
    _LastUpdateCheckSuccessTime=int64:01d8f9c1abad5c0a
    _LastUpdateCheckTime=int64:01d8f9c1abad5c0a
    Authentication=VncAuth
    Password=d00971cd8cacb99e
    ViewOnlyPassword=d00971cd8cacb99e

    2. set a VNC password (optionally read-only)

    $ vncpasswd -service
    Password:
    Verify:

    Now enable/restart the vnc service:

    systemctl enable vncserver-x11-serviced
    systemctl restart vncserver-x11-serviced

    Encryption

    The Real VNC Server supports a super-set of the Encryption supported by Agilicus AnyX. You may need to set “Prefer On” to allow the two sides to negotiate.

    2f723b59 image

    At this stage you can follow the standard directions to create a VNC Desktop

    1. Resources/Desktops/New
    2. Add user permissions to new desktop
    3. Open Profile and select the desktop

  • VNC Desktop

    VNC Desktop

    VNC Desktop

    VNC Desktop

    Access any machine’s display, whether embedded or server, from a browser, from a local client.

    Allow multiple concurrent users, see what each are doing.

    Read-only and read-write access.

    VNC Desktop Overview

    The VNC Desktop feature allows browser-based use of remote graphical-oriented resources. This can include traditional operating systems like Windows, Linux, MacOS, but, also, includes embedded devices such as HMI.

    VNC has very weak intrinsic security (a read-only password, a read-write password, but no username). These passwords are in turn very weakly encrypted (3DES), and, must be 8 characters. As a consequence, it is not safe to use by itself with e.g. port-forwarding.

    Agilicus AnyX adds a Zero Trust layer, with strong identity and modern encryption, making these safe to use remotely.

    Setup

    Assuming you have the VNC Server already running and available, you can create and access a VNC Desktop by:

    0a2da709 image
    1. In the Agilicus Admin interace, ‘Resources/Desktops/New’, select ‘a new VNC remote desktop
    2. Select the connector which is adjacent to the VNC Server
    3. Give this VNC Desktop a name. You will use this in the Profile to select the machine
    4. Select the address (as the connector would see) it of the VNC server. E.g. on the machine running the connector, you should be able to ‘ping’ this hostname. NOTE: if the connector is on the same machine as the VNC server, you may need to ‘enable loopback connections’ in the VNC Server configuration.
    5. Optional. If you wish to have the Profile VNC Web interface auto-sign-in (after you have presented your single-sign-on-credentials) you may enter the read-write (and/or read-only) password of the VNC server. If these are set, users may be forced into a read-only role by permissions later.
    6. Assign permissions to who may use this desktop. If ‘viewer’ is selected, and the read-only password was given above, the user will be auto-signed-in as a read-only user.

    At this stage, you can open https://profile.MYDOMAIN and you should see this VNC resource on Desktops.

    7ad695e6 image
    462a4b9f image
    d6e4fb6b image
    a08bf349 image
    fe55711e image