Agilicus Connector in Private VPC In AWS EC2
Install, Save, Simplify
You have a Virtual Private Cloud (VPC) in AWS EC2. It has private-only IP addressing. You need to ssh to some hosts within it, or remote desktop, or share some folders, etc. In this example we will show how to install the Agilicus Connector onto a t2.micro instance, with no public IP (and no NAT Gateway), and, use that to reach other instances within the VPC directly. There is no routing, no inbound or outbound connectivity otherwise.
Overview
You have a Virtual Private Cloud (VPC) in AWS EC2. It has private-only IP addressing. You need to ssh to some hosts within it, or remote desktop, or share some folders, etc. In this example we will show how to install the Agilicus Connector onto a t2.micro instance, with no public IP (and no NAT Gateway), and, use that to reach other instances within the VPC directly. There is no routing, no inbound or outbound connectivity otherwise.
Note: you can also follow these instructions AWS Doc to install a NAT gateway into your VPC, and then install the Agilicus Connector on a single machine within the VPC. This would allow your other VPC components to reach outbound.
In this example we will show a setup where a dual-homed t2.micro
Step 1: Create Private VPC
For this demonstration the private VPC has no NAT gateway, no Internet access. This is an internal only network. You can decide whether it has onwards access to other Amazon services if needed.
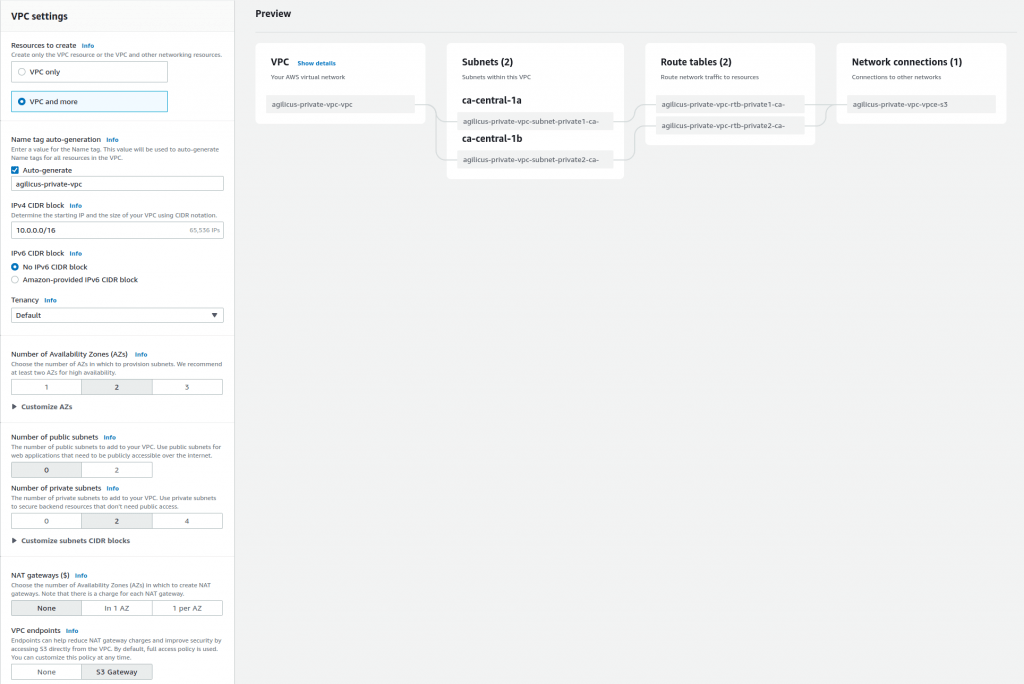
Step 3: Create private EC2 Server
For demonstration purposes we create an EC2 server to ssh to.
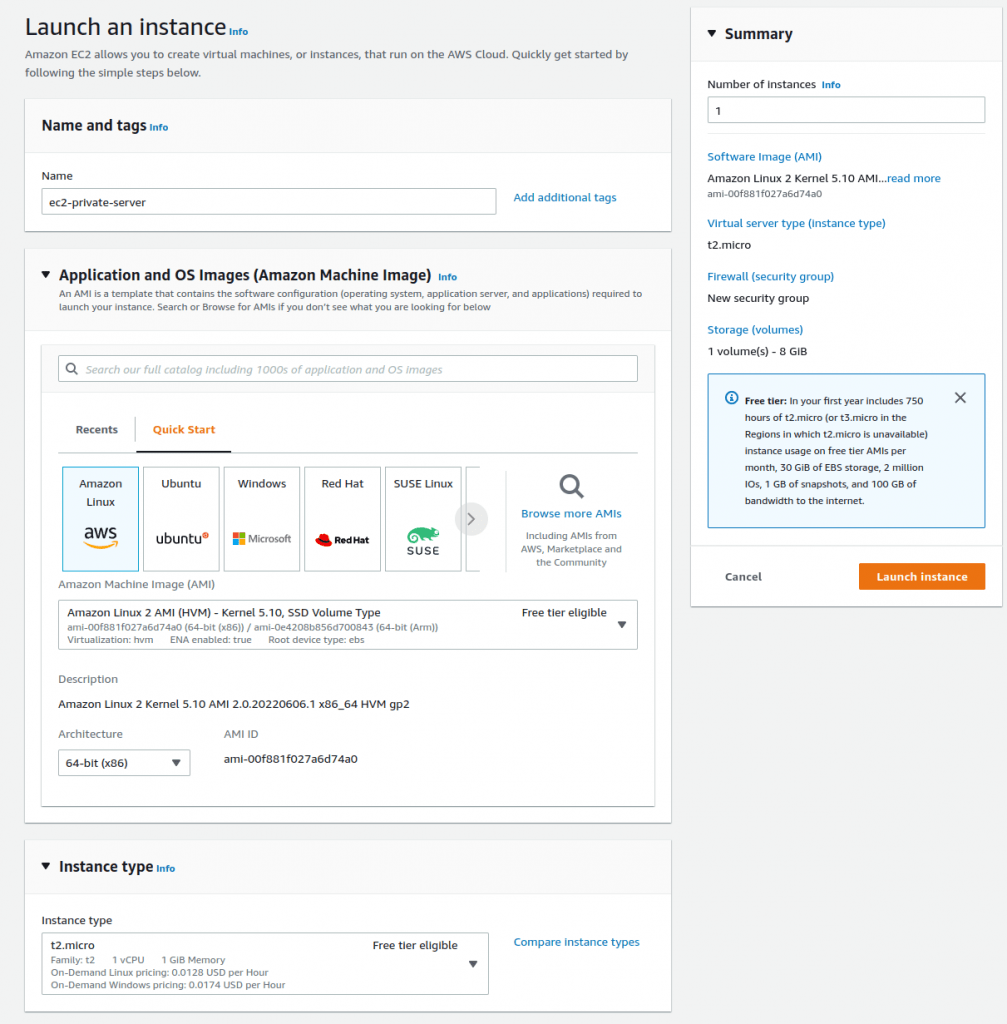
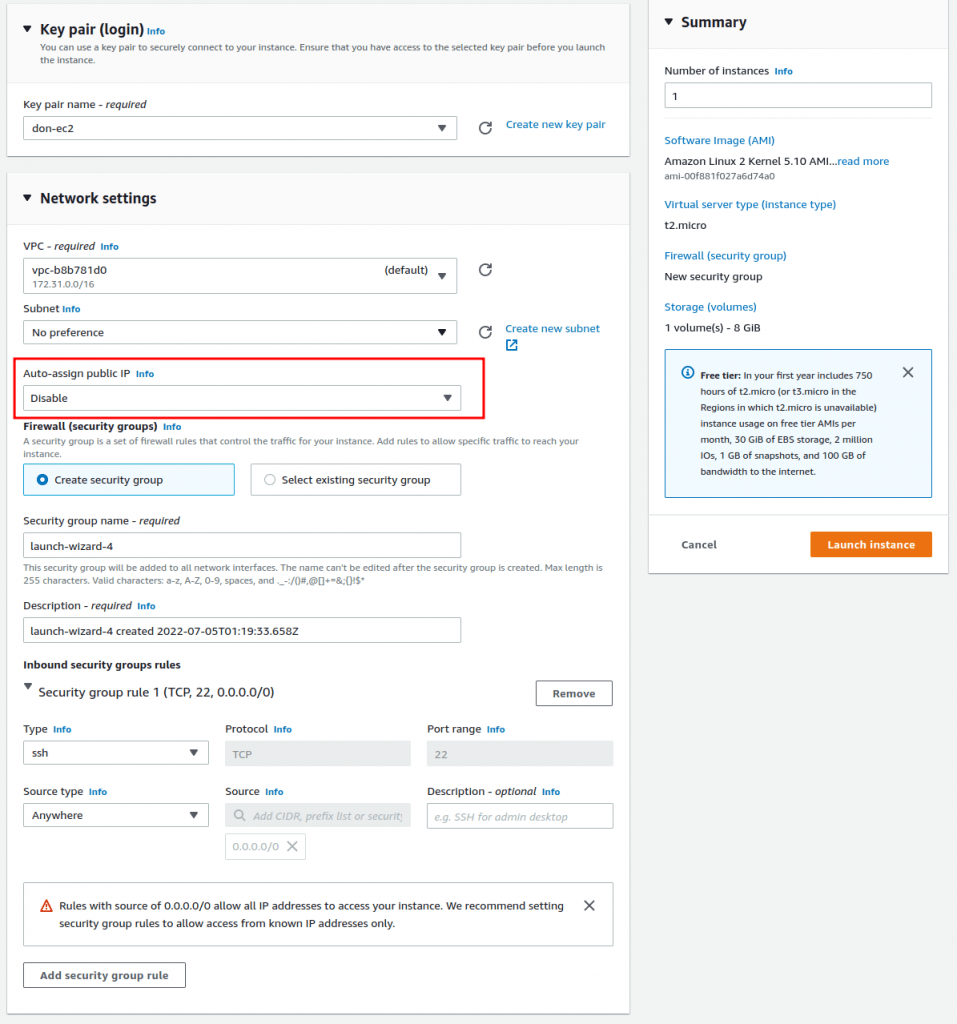
Step 4: Create dual-homed EC2 instance for Agilicus Connector
This machine will act to straddle the private VPC and the public Internet. It does not route, it does not NAT. No traffic will flow from/to it without going through the Agilicus Identity-Aware Firewall.
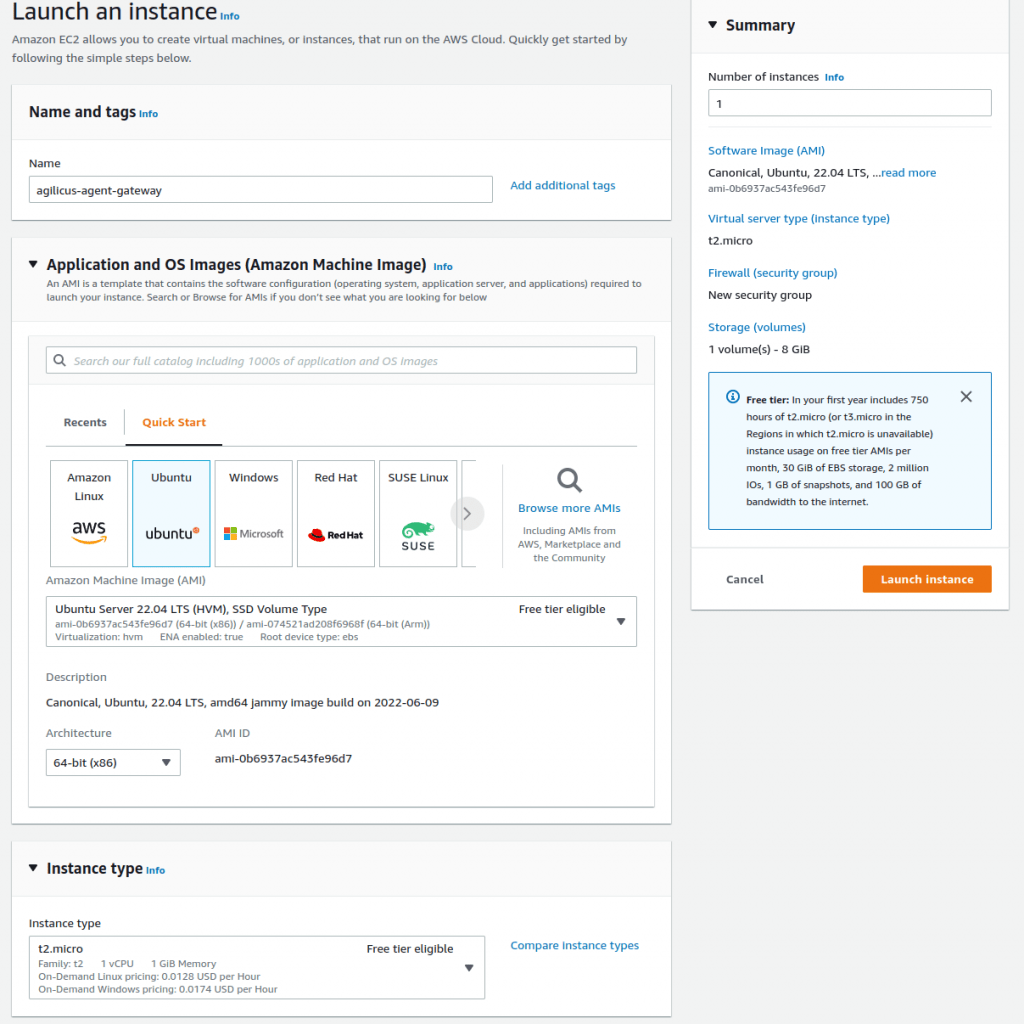
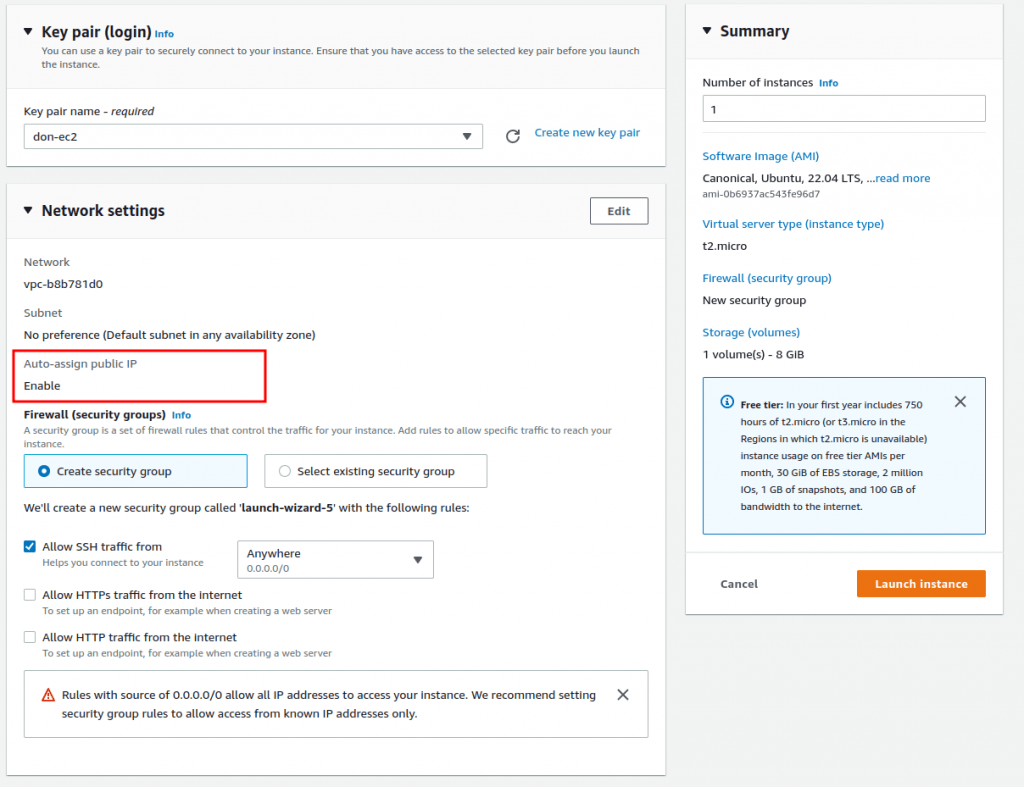
OK at this stage we have a VPC with no public IP. We have a private server on it with no public IP. We have a 2nd server, with a public IP, that can reach the devices in the VPC. We will now install the Agilicus Connector to facility onwards ssh.
Now, if we look at the config of the private server, we can see its hostname and IP:

Step 5: Install Agilicus Connector
These instructions are as normal for a Linux host. We create the connector in the web front end, it gives us a command line to run.
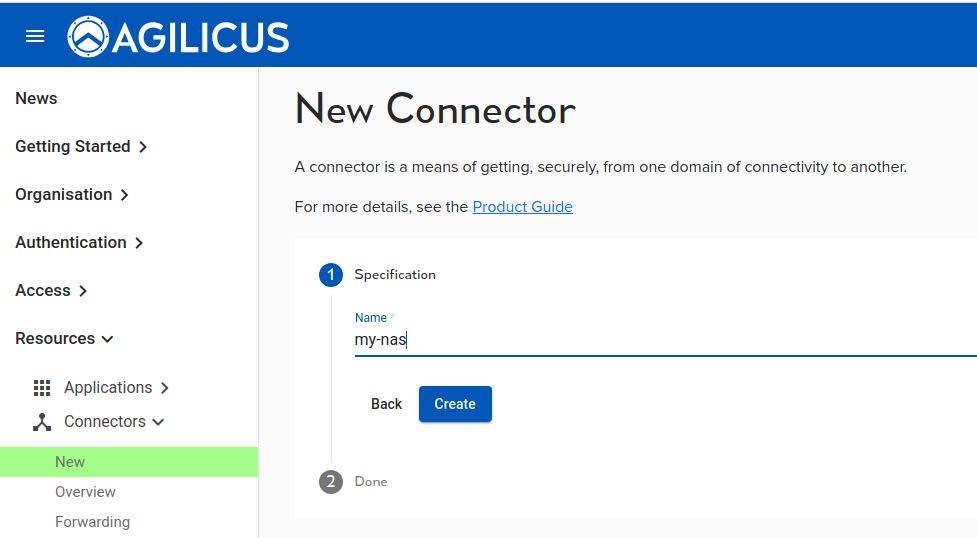
We are now given a command line to run. We paste it into the ssh on the Agilicus Gateway server (the one with the public IP):
# which curl && (curl -sSL agilicus.com/www/releases/secure-agent/stable/install.sh > /tmp/i.sh) || (wget -O - agilicus.com/www/releases/secure-agent/stable/install.sh > /tmp/i.sh); sh /tmp/i.sh -c JhtPxw9GVXXXXXX -s yw6XXXX
/bin/curl
OS: <Linux>, Machine: <aarch64>, END: <le>
Fetching https://www.agilicus.com/www/releases/secure-agent/stable/agilicus-agent-arm64 into /tmp/agilicus-agent-arm64
-rwxr-xr-x 1 root root 46268416 Jul  8 11:37 /tmp/agilicus-agent-arm64
+ /tmp/agilicus-agent-arm64 client --install --challenge-id JhtPxw9GXXXXX --challenge-code ywXXXX
INFO[2023-07-08T11:37:53-05:00] Starting connector - version v0.211.3
INFO[2023-07-08T11:38:08-05:00] Check if the agilicus connector is already running as a service. If so stop it
INFO[2023-07-08T11:38:08-05:00] Create file /usr/bin/agilicus-agent-wrapper.sh
INFO[2023-07-08T11:38:08-05:00] Create file /etc/systemd/system/agilicus-agent.service
INFO[2023-07-08T11:38:08-05:00] Will install to /agilicus-agent-wrapper.sh -> {/usr/bin/agilicus-agent-wrapper.sh -rwxr-xr-x <nil>}
INFO[2023-07-08T11:38:08-05:00] Will install to /agilicus-agent.service -> {/etc/systemd/system/agilicus-agent.service -r--r--r-- 0xd97540}
INFO[2023-07-08T11:38:08-05:00] Create a directory at /opt/agilicus/agent/tufmetadata/latest
INFO[2023-07-08T11:38:08-05:00] Create a directory at /opt/agilicus/agent/tufmetadata/stable
INFO[2023-07-08T11:38:18-05:00] Create a user and group named Agilicus to run the agilicus-agent service
INFO[2023-07-08T11:38:18-05:00] Copy executable to /opt/agilicus/agent
INFO[2023-07-08T11:38:18-05:00] Set permissions to Agilicus on /opt/agilicus/agent
INFO[2023-07-08T11:38:18-05:00] Create symlink from /usr/bin/agilicus-agent to /opt/agilicus/agent/agilicus-agent-arm64
INFO[2023-07-08T11:38:18-05:00] creating connector instance
INFO[2023-07-08T11:38:19-05:00] Join a connector cluster
INFO[2023-07-08T11:38:19-05:00] Start agilicus-agent service
INFO[2023-07-08T11:38:21-05:00]
INFO[2023-07-08T11:38:21-05:00] Installation Complete
INFO[2023-07-08T11:38:21-05:00]
At this stage we are done, and ready to create an SSH resource in the Agilicus Admin GUI. We do this as normal.
Now open Agilicus Launcher and observe we can ssh to the ec2-private server, both from the Web interface, and, from our desktop.
If desired, enter a manual ~/.ssh/config entry to override the private key
Host ec2-private-server
 Port 22
 User ec2-user
 ProxyCommand agilicus-agent wscat --oidc-issuer https://auth.dbt.agilicus.cloud --hostname %h --port %p
 IdentityFile /home/don/.ssh/don-ec2.pem
At this stage we are done. We can ssh directly there:
$ ssh ec2-user
ast login: Tue Jul  5 01:36:47 2022 from ip-172-31-13-67.ca-central-1.compute.internal

       __|  __|_  )
       _|  (     /   Amazon Linux 2 AMI
      ___|\___|___|

https://aws.amazon.com/amazon-linux-2/
[ec2-user@ip-172-31-6-69 ~]$
Want Assistance?
The Agilicus team is here for you. The ‘Chat‘ icon in the lower left, here, or in the administrative web page, goes to our team.
Or, feel free to email support@agilicus.com
Not yet a customer? The TRY NOW button will walk you through the process.
