Kubernetes Connector Install

The Kubernetes install is intended for advanced usage only. It is for users who are integrating with a larger system. As a pre-requisite, you will need kubectl installed on the machine you will do the installation from.
The steps initially are similar:
- Create a new Connector in admin
- Select “Install’
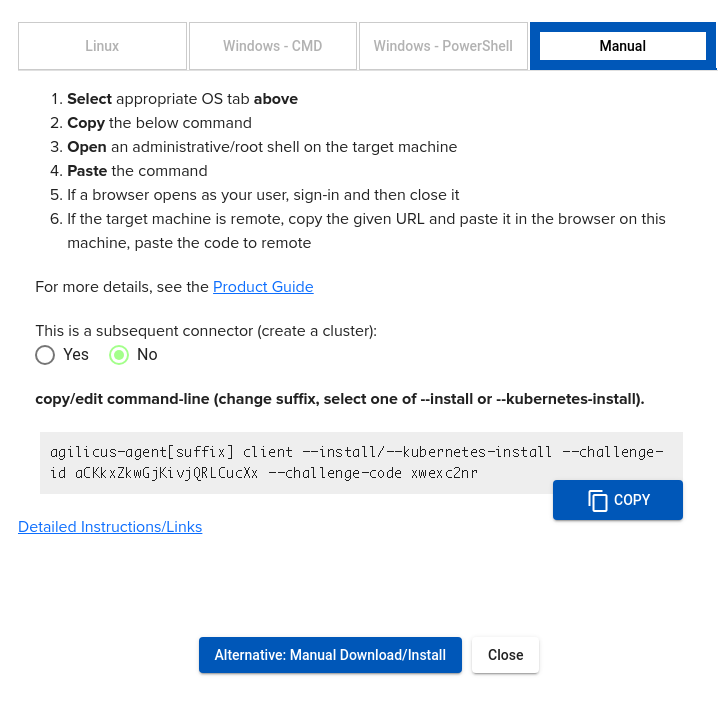
- Download the binary (using the alternative manual install, see link for all binaries etc)
- Select ‘Manual’. Change –install/–kubernetes-install to –kubernetes-install. Adjust other parameters as needed
- The command will output as below.
- Inspect the generated YAML, adjust if necessary
- Installl with kubectl apply
$ agilicus-agent client --kubernetes-install --challenge-id XXXXXX --challenge-code XXXXXX
INFO[2023-05-30T18:26:47-04:00] Starting connector - version v0.200.6
INFO[2023-05-30T18:27:00-04:00] creating connector instance
INFO[2023-05-30T18:27:01-04:00] Join a connector cluster
INFO[2023-05-30T18:27:01-04:00] Output Kubernetes YAML
INFO[2023-05-30T18:27:01-04:00] Now run:
kubectl apply -f /tmp/agilicus-agent-921551629/agilicus-agent.yaml && rm -rf /tmp/agilicus-agent-921551629
INFO[2023-05-30T18:27:01-04:00]
INFO[2023-05-30T18:27:01-04:00] Installation Complete
INFO[2023-05-30T18:27:01-04:00]
Theory of Operation
A small (1G) PVC will be created. This will hold the small amount of configuration (service account updates)
When creating network services, use the same name service resolution you would normally use in Kubernetes (e.g. SERVICE.NAMESPACE)
A Deployment will be created with replicas=1
Related Configuration
Return to Product Configuration
- Agilicus AnyX Frequently Asked Questions
- VNC Desktop
- Agilicus Connector – Container/Docker
- Agilicus Connector – NanoPI R5S
- Agilicus AnyX Product Updates
- Agilicus Connector – Microsoft Windows
- Sign-In Errors
- Time Synchronisation
- Locked-Down Networks Certificate Revocation
- Signup: Firewall Configuration
- Geo-Location-Based Access Control
- Resources – Overview, Concepts
- Connect to VTScada – Adding a Web Application
- Web Application Security
- Administrative Users
- Define Application: Proxy
- Authorisation rules
- Real VNC & Raspberry Pi
- Connector Install: Raspberry Pi
- Kubernetes Connector Install
- Linux, FreeBSD, Embedded Connector Install
- Connector Install: Ubiquiti EdgeRouter X
- Audit Destinations
- Agilicus Connector Install: MikroTik RouterOS
- Connector Install: Netgate SG-1100 pfSense
- Identity Group Mapping
- Billing
- Auto-Create Users From Specific Domain With Google Workplace
- Organisation
- Authentication Audit
- Authentication Issuer – Custom Identity
- Sign Up
- Microsoft ClickOnce
- Groups
- Agilicus Connector Windows Cluster
- Launchers
- Forwarding
- Usage Metrics
- Service Accounts
- Identity & Authentication Methods
- Content Security Policy
- Users
- Sign-In Theming
- Sign in With Apple
- Azure Active Directory
- Sign in With Microsoft
- Agilicus Launcher (Desktop)
- Agilicus-Connector
- Zero-Trust SSH Access
- Theory of Operation: CNAME + DOMAIN
- Zero-Trust Desktop Access
- Command Line API Access
- Applications
- Permissions
- Profile
- Multi-Factor Authentication
- Authentication Rules
- Application Request Access
- OpenWRT Connector Install
- Synology Connector Install
- Authentication Clients
- Shares
- Services
- Resource Permissions
- Resource Groups
- Legacy Active Directory