Some applications directly read from a database without an intermediate API layer. An example is QField, a GIS application for mobile devices, directly reaching a Postgresql database.
For applications that use a text-based template file as their method of finding the database (e.g. XML, .ini, etc.) fetched over a network, this feature will enrich/modify the template file in real time with an appropriate credential for the user, allowing direct access to the database without an open firewall.
There are two components to the usage:
(Admin) setup the template
(End-user) use Profile to download a custom-version of the template for each user, opening in their application
End-users will see a seamless experience on their device: their application will appear as if on the LAN with the database.
Administrators will see a secure experience for the end-user: multi-factor, per-user credentials, no database credentials shared externally.
Admistrative Setup
High Level Steps:
Create ‘Database’ resource
Modify your connection file / template
Create a ‘Template’ with the modified file
Create Database Resource
At this stage, the database resource is ready. You are prompted for a set of common actions (assign permissions, create a template). No one (including you the admin) will be able to use it without permissions assigned.
The options include:
Create a template. We will do this below in another step, but you may feel free to do it here
Add to one or more resource groups. You will commonly have multiple resources that behave as a single entity (e.g. a web application + database combination)
Assign permissions: give a single user, or a group of users the ability to use this Database from Profile (e.g. on their device)
Assign (access) policies such as specific multi-factor or geographical restrictions
Modify Existing Template
These instructions will vary on a per application basis. Essentially, you have 3 fields somewhere in the connection/template file you need to modify. These are:
${user.email} — replace the built-in user (which is usually the database username) with this string
${api_key} — replace the built-in password with this string
${resource.uri.domain} — replace the built-in hostname with this string. If there is a port number (e.g. 5432 for Postgresql) change this to 443.
You may do these through the GUI of the database application, or, via a text editor.
Create Template
At this stage you should upload the template you modified above:
You will now be given the opportunity to name it (usually this is not seen by the user, but, the extension might be used) and to give it a MIME type (this might be used by your application to automatically find/open).
Now associate the template with the Database we created above:
Now apply. At this stage, the user(s) who you have given permission should see an icon for the database name in https://profile.__MYDOMAIN__, and, if they select it, should download the template file with those fields filled in.
Securely sharing directories from individual servers or desktops has never been simpler. No VPN, no ransomware. No client to install.
Theory of Operation
General Steps
The Secure File Sharing is facilitated by an Agilicus Connector on the host(s) you have files you wish to access. Creating this is very simple, the only configuration option is a name.
Once the Connector is installed, you can later add new directories to share, modify who has access, and remove the share entirely, all from the admin user interface. The Connector will automatically keep itself up to date and pick up new configuration. Set it and forget it.
To create a new Share, you will walked through the steps in the Admin web interface. First, select the Connector you have previously installed. You may have multiple shares on the same Connector.
Now we give the Share a web URI name. This is something that will show up for the end-user, they will be given instructions to mount something like https://file…/NAME.
You must also configure a globally-unique name for this Share. You will see this in the Administrative interface, in the audit interface, etc. These may be the same if you wish.
We will now supply a “Local directory”. This is the directory on the machine the Connector is installed on. See the note below on permission, it is important that the Connector have access to it.
At this stage we are complete. As an administrator you will be given instructions on how to mount the Share, which you may use to test it is working correctly. Generally, each user in your organisation will use Profile in order to request and use a Share.
To manually mount the Share, there are 3 parameters:
URL. This will look like https://files.__MYDOMAIN__/URI-NAME
Username: this will be the email-address you use with the Agilicus system (e.g. your Active Directory login, your Google Login, etc)
Password: this will be an access token. This is generated for each user independently. End users may request access, or request an Access Token via Profile.
The Profile interface will give these parameters to each user.
Permissions, Access Control
Permissions work similarly to Applications. Each Share has 3 main permissions (Owner, Editor, Viewer). Users may be individually granted permissions per share, or, Groups may be used. We recommend Group-based access.
File Level Permission
By default, all files on a share are treated alike for permission (share-level permissions). However, you may enable per-file permissions. If this is enabled, the user’s SID or email are compared against the machine the connector is running on for permission on each file. This allows e.g. NTFS-level per file permissions. The user must have the permission to login locally to the machine for this to work.
NOTE ON PERMISSIONS
❗
Many Microsoft products (e.g. Microsoft Office) will create a Lock-file or a Temporary file in the same directory. This can be confusing when using a permission other than Owner. For example, if the permissions are ‘Editor’, a user can update an existing file, but not delete it nor create new files. If they open a Microsoft Word file, they may see an error indicating that the temporary file cannot be created. Unless you are using a small set of well-known applications, we recommend using Owner permissions.
NOTE ON MAXIMUM FILE SIZE
❗
The default limit for maximum size on some Windows clients is 50MiB. We recommend setting FileSizeLimitInBytes to a larger value, e.g. 500MiB. This is located in HKLM\SYSTEM\CurrentControlSet\Services\WebClient\Parameters See https://learn.microsoft.com/en-us/iis/publish/using-webdav/using-the-webdav-redirector for more information. This setting is on the client (where you will mount the share).
Access Request
Variable Expansion
In some cases you may wish the path to be templated, for example, mount /PATH/USERNAME. You may do that with string substitution. Variables may be expanded in the format of ${VARIABLE}.
The following variables are supported:
AGILICUS_USER_FULL_NAME
AGILICUS_USER_FIRST_NAME
AGILICUS_USER_LAST_NAME
AGILICUS_USER_EXTERNAL_ID
AGILICUS_USER_EMAIL
AGILICUS_USER_EMAIL_NAME
AGILICUS_USER_EMAIL_DOMAIN
Linux Specific
Permissions
The Agilicus Connector runs as an unprivileged system user. This means that, by default, it will not have permission to read files in a shared directory created by you. To give it access, create a group whose purpose is to group users who have permission to read and write shared files on the machine. Add the agilicus user to the group, then give that group permission to access the shared folder.
# Set up the shares group and add the agilicus user to it
sudo addgroup shares
sudo usermod -a -G shares agilicus
# Configure the share and all files within it to allow access to the shares group
sudo chgrp -R shares my-shared-directory
sudo chmod -R g+srw my-shared-directory
# Ensure files created by the connector and other users have the proper permissions
sudo setfacl -d -m g::rwx my-shared-directory
Windows Specific
Permissions
When installing the connector, by default it is installed as the ‘SYSTEM’ user. This user is typically appropriate for running a service, but there are times it may not have adequate permissions to access a specific folder for a share. When this happens you will see a ‘List Error’ trying to access the share from profile, and it won’t mount properly for end users. This can happen in particular when sharing from a network drive, where local permissions don’t grant access.
When this happens, it may be appropriate to assign it to a different user. This user might be a domain admin, a local admin or a separate user which you giver permission to access the folder being shared. This can be done by opening the Microsoft services applet, finding the ‘Agilicus Connector’ service, and changing the Log On option to run as a user with access to the share.
When you change the user which is running the connector, you must also ensure that the user running the connector has full read+write permissions to the “C:\Program Files\agilicus\agent” folder.
Manual Mount with Map Network Drive
A Share may be mounted using the Windows Explorer, just like any other Share. No special software needs to be installed. You will need the 3 parameters
Automatic Mounting
For end users with the Agilicus Launcher installed on the desktop, a Share can be automatically mounted/refreshed. This is particularly useful in conjunction with Multi-Factor authentication. In those mode, a ‘drive-letter’ or ‘mount path’ is configured as per below image, and the Share will automount for each user.
Linux Specific
For mounting a share automatically on Linux, fill in the ‘Linux path’ field on the client configuration shown above.
On Linux some extra setup is necessary in order to make automatic mounting work. The davfs package needs to be installed with the non-root mount option enabled On debian-based systems like ubuntu, you would run the following: sudo apt install davfs2 In the package configuration screen, choose the left option.
Next add you user to the davfs2 group: usermod -a -G group $USER You will have to reboot for this to take affect.
Lastly, for each share add an entry into your /etc/fstab file matching the following https://<YOUR SHARE URI> <LINUX PATH> davfs rw,user,noauto 0 0 This must match the uri for the share and the path configured to mount it.
From now on, whenever you run refresh on your desktop, the share will automatically mount!
Advanced Setup: Local Routing Performance
This is an optional section. It shows how to route traffic locally, from a machine with direct access to the connector facilitating the share. In order to achieve this, we rely on a local DNS (and split horizon DNS). The Connector will expose a local port (443) with the same hostname and certificate as externally.
In order to improve performance and decrease bandwidth usage, it can be useful to have your local users access a share directly, rather than over the internet. While this still requires the users to initially login to the Agilicus platform, it enables the network traffic for accessing the share itself to never leave the premises.
The end goal would look something like this at right.
To follow this guide, you have to already have a share created. Ensure that the share is working.
New shares will have the feature enabled to automatically support this task.
After you have your share working, you will need to ensure your site’s network is setup to access the share. By default, it will be exposed on port 443 (https) on the computer the connector is running on. If there is already a web server on that site, the connector could conflict and be unable to serve the traffic. In those cases, you will need to resolve the conflict and move either the agent or the website.
For each connector with assigned File Share resource, exposing its local server TCP port 443 simply requires enabling via the “Manage Routes” dialog:
By default we can bind to all the local server interfaces. If there is a segmentation requirement, we can specify the IP address the connector should only bind to.
The next step is setting up DNS to resolve share addresses to the connector onsite. You will need to configure the local dns server to route the domains for Agilicus shares to the local connector. Agilicus shares follow the pattern: <share-name>.share.<your agilicus domain>. For example, if your share is named ‘accounting’, and your domain is ‘cloud.acme.org`, then the share would be `accounting.share.cloud.acme.org`. You can also see what domain your share is on in profile by clicking ‘Manual Mount’ and checking the URL.
There are two choices available for how you configure your local dns entries.
Create a wildcard record *.share.<your agilicus domain> to direct all shares to the local connector. This will work correctly provided that all shares for your organization are available from this connector
Create a record for each specific share.
Whether you choose 1) or 2) depends on your specific network layout and your dns server’s capability for wildcard entries.
For example with a share named ‘test’, and the local connector on ‘192.168.122.1` a config in OPNSense would look like this.
A service is a basic primitive of a Network Resource. It consists of a set of coordinates that ultimately resolve to a TCP host + port.
Configuration includes:
Service Name: This is the name the service is accessed via as a user (e.g. the ssh name they will use) or one of your Application Resources will use to address
Hostname/IP: This is the name that the Secure Exposed Agent will resolve. It is often the same as the service name
Port: the TCP port # (0-65535)
Override IP: typically blank, but, in the event that DNS is not available, the IP address of the Hostname.
Via Connector: this is the method and connection to reach the Network Resource.
Accessed via TLS: If checked this connectons to this Network resource will be initiated via TLS
Verify TLS: if TLS is checked, if this is checked, the destination certificate is confirmed
SSH by its very nature is end-to-end encryption with strong protection against Man-In-The-Middle attacks. All servers need to be accessible via SSH to be manageable, often by external users (e.g. vendors, outsourced NOC, etc). However, despite SSH being strong on encryption it is challenging on accessiblity. The servers are typically on private networks (e.g. Virtual-Private-Cloud VPC, internal network VLAN’s, etc). Making them directly accessible to the Internet can be dangerous (we would have to somehow police that all users have passphrases on their keys, that we don’t have passwords allowed, etc.). SSH jump-boxes add a step to the workflow, are difficult to ssh-port-forward and scp through. VPN access is difficult to secure on a per-server basis, often being all-or-none.
In this guide we will setup the Agilicus Zero-Trust Network Access to directly access arbitrary SSH servers. The users will see them as being directly Internet connected. The users will have zero configuration (after the initial setup). Users can be individually authorised on a per SSH server basis. Additionally, users can be federated for identity by any upstream identity provider, allowing an external vendor to be identified by their own corporate Azure Active Directory, an independent contractor via their Google login.
The data flow is such that the SSH TCP session is intact from the client to the server: the hostkeys are unaltered, SSH anti-tamper mechanisms are unperturbed. SFTP just works.
The end user can use any SSH client (ssh command line, mobaxterm, putty, etc), with no complicated config to remember. The system administrator can gate access on/off per user, and, see an audit trail of who has accessed what, when, from where.
SSH Access Setup
Note: you can use a site-to-site VPN via IPSEC, or use the onsite Agilicus Connector for each pool of servers. These instructions assume the latter.
1. CREATE ORGANISATION
Your Organisation lets you setup your identity providers, your DNS name (CNAME), and control your users. See SIGNUP
2. SETUP IDENTITY
You can enable Google, Apple, LinkedIn as check box items. You may also wish to enable Azure Active Directory Also setup initial users and group membership.
3. CREATE CONNECTOR PER SITE
Each pool of servers needs a method to reach it. This can be a site-to-site VPN, or an on-site connector. Install a connector now, this may be on each SSH server, on 1 of the servers that can reach the others, on a machine in the same network, its up to you.
4. CREATE SSH RESOURCE
The SSH resource has a unique name, a upstream host-name, and upstream port. Configuration will be automatically created for desktop clients such as OpenSSH or Putty.
5. ASSIGN PERMISSIONS
We must now assign ‘Owner’ permission to each user or group that should be able to connect. See “Resource Permissions” for more information.
SSH Resource Setup
4 steps:
Select the connector (the site on which the underlying SSH resource exists)
Create a name for the SSH resource. This will appear as a valid hostname and must be unique within your sub-domain. Feel free to use a pattern, e.g. ‘site-host-ssh’.
Select the hostname/IP and port that the SSH server is on in that remote network.
Assign permissions (who can use this SSH resource)
The underlying SSH resources will also show up under Network Resources.
Automatic Sign-In (cached credentials)
In some cases you wish end-users to be able to sign in via the web interface, but do not wish to share the credentials with them. For this purpose Agilicus has a secure credential store and key or password stuffing. You may configure this during the creation of a new SSH resource, or, later on the existing resource as below.
Note: the SSH key cannot be retrieved from the system. Once you have configured it, it is one-way encrypted, if you wish to change it later you may, but you must keep your own copy.
Using the SSH Resource
If you have not done so, install the Agilicus Launcher on your desktop (Windows, Linux Mac) from profile (https://profile.__MYDOMAIN__). The Launcher support runs on demand, it is not a service. It will automatically configure OpenSSH (Windows, MAC, Linux), or Putty (Windows).
Note: The Launcher will configure OpenSSH if the file ~/.ssh/config exists. If you have not used SSH before, you might need to create this file.
At this stage, you can ssh directly to the server, using the name you gave above. For example, if in step 4 you called the SSH resource “foobar”, you can type ‘ssh foobar’. This might bring up a browser to identify you and/or perform multi-factor authentication. The data flow is as shown below.
A Network Resource is an arbitrary network IP address and port. This might be a Remote Desktop, a Database, an ERP system. Typical access control is done via network access control lists. To expand this via cryptographic-based zero-trust networking, the Agilicus system can expose the Network Resource via a Connector and then provide authentication and authorisation based security on it onwards to other users or systems.
A common use case for Forwarding is a need to have a Network Resource available from one site to another. As an example, consider a small company. It has two offices. Each office has a typical small business router and a few staff. One of the sites runs a database which is used by a desktop application.
In this case, consider the following approach:
Install Connector on site with database (on the database server or another)
Install Connector on site needing access (on the desktop running the application, or another)
Create a Network Resource for the database. Attach it to the proper Connector
Create a Forwarding Resource on the site needing access. Join the two.
To keep the terminology straight, a ‘network’ is the destination. It is where traffic *leaves* the Agilicus mesh, and onwards to the ultimate resource. A ‘forwarder’ is the ‘source’ or ‘ingress’, its where traffic enters the Agilicus mesh.
Thus if you had a Linux device you wanted to be able to ssh to unattended from a synology NAS, you would install a connector on the Synology, a connector on the Linux server, a network would be created attached to the Linux connector with ‘localhost:22’, and, a forwarder would be created attached to the synology connector listening to e.g. localhost:2222
You will be asked a few questions:
destination IP/hostname. This is the hostname or IP as resolvable by the connector installed on the site with the database. It will typically be the same as you would enter in your desktop application.
destination Port. Same as 1
Source IP/hostname. This is typically left blank(all), meaning the host with the connector will allow any local network host to use it. If you wish to lock it down to the local desktop consider entering ‘localhost’ here. By default this is ‘localhost’ (meaning the application wishing to connect must run on the same host as the Connector). You may change this to ‘0.0.0.0’ (meaning any host in the same network may connect.
Source Port. This is typically left blank (meaning same as destination). In some environments you may wish to use a different port here (for example, if the destination port is privileged, <1024, since the Connector runs unprivileged, you may e.g. use 80 for the destination port and 8080 for the source port)
Most of your applications are now modern, responsive web apps. However, you still have some native Desktop applications. You need to be able to access them remotely, safely, simply. You need to be able to grant access to specific Desktops to specific users, but, they may not work for you. Your Desktop may run in a site without a public IP, or a configurable firewall allowing safe inbound access. Perhaps your house, perhaps a branch office.
In 10 minutes you can have 1-click remote access to that Desktop. With no configuration onsite, no change to the Desktop or the firewall.
Via Remote Desktop Protocol, or via VNC.
Via a Native Client, or via a web interface.
Desktop Access Setup
Note: you can use a site-to-site VPN via IPSEC, or use the onsite Agilicus Connector for each pool of servers. These instructions assume the latter.
1. CREATE ORGANISATION
Your Organisation lets you setup your identity providers, your DNS name (CNAME), and control your users. See SIGNUP
2. SETUP IDENTITY
You can enable Google, Apple, LinkedIn as check box items. You may also wish to enable Azure Active Directory Also setup initial users and group membership.
3. CREATE CONNECTOR PER SITE
Each pool of servers needs a method to reach it. This can be a site-to-site VPN, or an on-site connector. Install a connector now, this may be on each SSH server, on 1 of the servers that can reach the others, on a machine in the same network, its up to you.
4. CREATE DESKTOP RESOURCE
Each Desktop host will require a Desktop Resource to provide the coordinates. This will include a name, and hostname/IP. The Hostname/IP will be in the internal coordinates.
5. ASSIGN PERMISSIONS
We must now assign ‘Owner’ permission to each user or group that should be able to connect. See “Resource Permissions” for more information.
6. CONNECT
From https://profile.__MYDOMAIN__, you may open the Remote Desktop. By default this will launch your native remote desktop client (e.g. mstsc). You may also install the Launcher from the Profile, will give you an icon on your regular operating system start menu.
Detailed Desktop Creation
The ‘Desktops/New’ asks 3 questions:
Connector. This you will have already setup, you need 1 per site (or more if you wish, e.g. 1 per host)
Name. This will be the ‘name’ you assign permission to, it will show in the audit, the end-user will see it
Hostname/IP. This is how you would address the Desktop within the (private) site.
Once you have completed these steps, as an Administrator you will be offered the opportunity to download an RDP file. This will open in your native Remote Desktop application (on all platforms). The Desktop will become available approximately 1-2 minutes after you apply the config. (This is to test the configuration)
You may now assign permissions (by group, or by user). Each user who has access will see, in https://profile.MYDOMAIN, an icon for the same Remote Desktop. They may also install the Agilicus Launcher which will create start menu icons automatically.
The detailed steps and screen shots are shown below.
❗
Some versions of Microsoft Windows (e.g. Windows 10 Home) do not support Remote Desktop Server. You may try a different OS, you may try VNC, or, there are some workarounds.
Connection Parameter Override
End users may wish to configure specific overrides regarding their local displays, resolution, clipboard, etc.
The configuration options are found in their Profile (https://profile.__MYDOMAIN__), under their account icon.
Users may choose to passthrough their microphone or audio output, clipboard (cut and paste), usb devices.
Some remote desktop servers have multiple displays, these can be passed through if desired.
The user may select dynamic resolution (e.g. they can resize the current window and it will resize the remote), or a specific dimension.
NOTE: You may need to change the Network Level Authentication on the server
Press Win + R to open the Run command dialog box.
Type sysdm.cpl and press Enter to open the System Properties window.
Navigate to the Remote tab.
Uncheck the Allow connections only from computers running Remote Desktop with Network Level Authentication (recommended) box.
Press Apply and then press OK. From there, restart your PC to save these changes.
Resource Groups are a means of applying a common permission across a set of resources (connectors, applications, shares, etc).
Common uses for Resource Groups are:
all resources on a site
all resources of a type
all resources of a manufacture
all resources used by a specific Agilicus Launcher
A Resource Group may contain other Resource Groups, allowing nesting. Each Resource Group can contain 0 or more Resources.
A common overall strategy is to use Groups (of users) assigned by role, assigning permission of these Groups to Resource Groups by role/location/device-type etc.
The Agilicus AnyX Launcher acts to integrate the desktop environment with the online, browser environment. It can act to:
mount a share
open a remote desktop
SSH to a host
Run an executable
Install Browser Extension
A browser extension is available which simplifies the integration between the desktop and the browser. Install from the Chrome Web Store.
Once installed, in the users web Profile, they may directly mount a share, open a local application, open a remote desktop with native tool.
Install Desktop Integration
The desktop integration is installed from Profile. Navigate to https://profile.__MYDOMAIN__. Once signed in, see the Launcher menu, select the ‘Install’ button. This will download an executable to be run.
LAUNCHER FILE NAME
Note: the launcher download is named specifically for each user. Do not rename the file before running. On a MacOS device running Safari, it is possible that the browser will append a ‘.html’ to the file name during the download, please remove this before running.
Desktop Application Launcher
A launcher is a method of encapsulating all of the resources a desktop ‘fat client’ needs to operate.
Imagine a desktop ERP system. It needs a Share mounted in a specific location. It needs a TCP forwarded for a database. The desire is the end user can click a single icon and launch it, optionally being challenged for multi-factor authentication.
To use, first configure the individual resources (e.g. a Share, a TCP Forwarder, etc.). Give them unique names. Now, add a Launcher. The end user will see this appear as an Icon on their start menu. When launched, the application given will open, and the resources are guaranteed to be present. The user may first see a browser open to challenge their identity if it is not known.
Launcher Network Configuration
When using the launcher, it uses the resource members of the launcher in order to route connections.
In the example above, the MY-ERP launcher has the networks bob and win10 attached to it. When the MY-ERP application is launched, if it attempts to connect to any of the hostnames or override IPs in the launcher’s networks it will route them to the connector they are attached to.
In this example, If the ERP client connects to win10, 192.168.2.3, or 192.168.2.10 the launcher will route the connection to the appropriate connector.
NETWORK COLLISIONS
In order for the routing to work correctly, it is important that none of these overlap. In this example, the launcher will reroute connections to ‘192.168.2.3’, ‘win10’ and ‘192.168.2.4’. If for example two different networks had the same hostname then the launcher can’t route these connections appropriately. This is also the case if the override IP for one network matched the hostname or Override IP for another.
An example configuration with ambiguous networks. The launcher could direct an application connecting to 192.168.2.3 to either the bob or win10 network
Some consumers may wish to use ‘sign in with apple’. This is not common, we recommend using Google and Microsoft since they are simpler to administer, and simpler for the end user to use.
In a “Sign In With Apple” flow, the user will supply an email-address they used to register their Apple account. This might be @hotmail, @gmail, etc. This is typically done automatically by their browser or device.
Some users may have a different ‘appleid’ than the ’email’ on file with Apple.
In the Agilicus system, the ‘Email’ that is shared (shown in the screen shot at the right) should be used in the “Users” screen to link the user.
It is important that the user not use the “Hide My Email” option, since in that case there is no method to link the accounts.
NOTE: “Share My Email”
It is critical that the user select ‘Share My Email’. This is required to link the account between the Apple system and the Agilicus system. The user will not receive any email.If the user inadvertently selects ‘Hide My Email’ or does not provide a Name, they must delete their account in the Apple account settings, and then sign-in again.The user might otherwise see an error such as to the right.
If the user inadvertently selects “Hide My Email”, they must correct this through their Apple Account settings by removing the ‘Agilicus’ Application, and then signing in again.
To check if you have inadvertently selected ‘Hide My Email”, you can check in your iCloud settings (via your Apple device). First, open iCloud. Then select ‘Hide My Email’. If you see an entry for ‘Agilicus’ this means you have declined to provide your identity for purposes of Authentication.
In order to correct this, first remove the Apple ID Login. Once removed, you may sign in normally (remembering to keep ‘Share My Email’ selected).
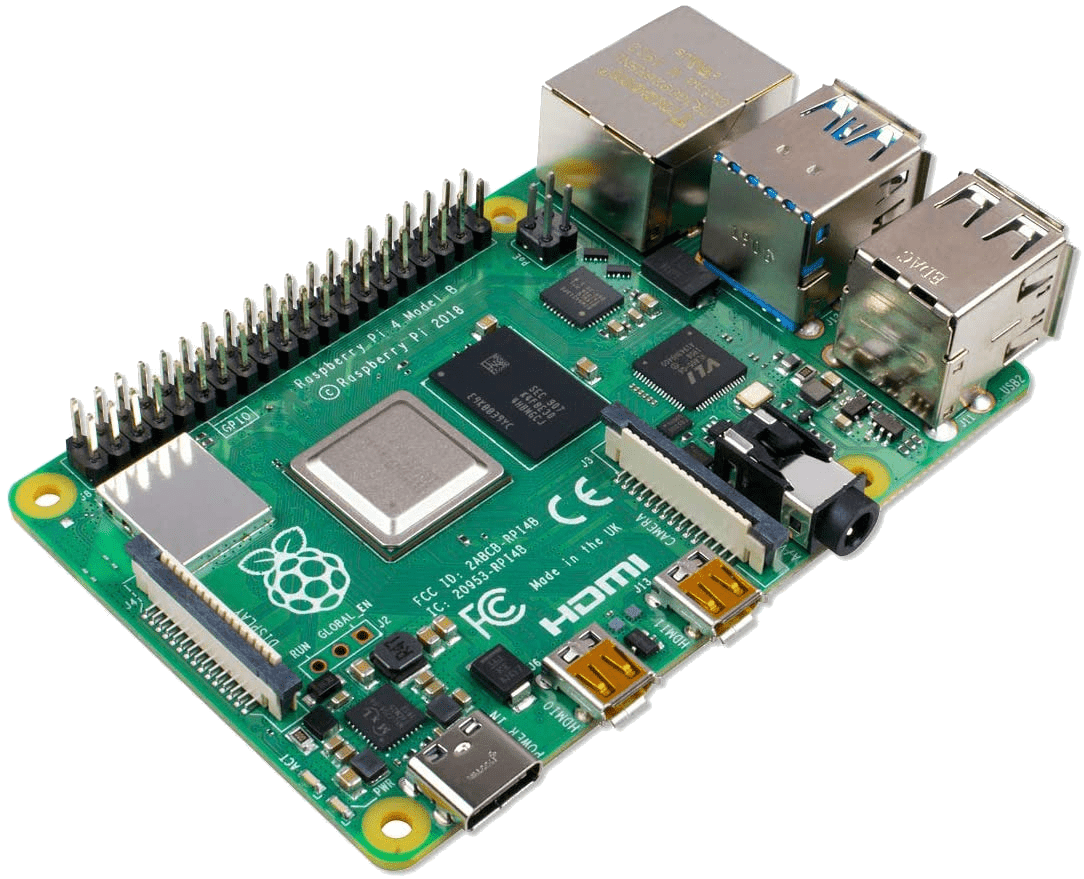
The Raspberry PI supports multiple operating system distributions. The default used is often Raspbian, which has a VNC-similar server installed called Real VNC.
Real VNC is not enabled by default. It also uses a proprietary authentication scheme by default.
To enable VNC on your Raspberry Pi and access via Agilicus Any-X, you may use the option panel, changing the Authentication from “Unix password” to “VNC password”. Or, if you prefer, you may edit the text files as below.
Add Authentication=VncAuth to /root/.vnc/config.d/vncserver-x11
The Real VNC Server supports a super-set of the Encryption supported by Agilicus AnyX. You may need to set “Prefer On” to allow the two sides to negotiate.
At this stage you can follow the standard directions to create a VNC Desktop
The VNC Desktop feature allows browser-based use of remote graphical-oriented resources. This can include traditional operating systems like Windows, Linux, MacOS, but, also, includes embedded devices such as HMI.
VNC has very weak intrinsic security (a read-only password, a read-write password, but no username). These passwords are in turn very weakly encrypted (3DES), and, must be 8 characters. As a consequence, it is not safe to use by itself with e.g. port-forwarding.
Agilicus AnyX adds a Zero Trust layer, with strong identity and modern encryption, making these safe to use remotely.
Setup
Assuming you have the VNC Server already running and available, you can create and access a VNC Desktop by:
In the Agilicus Admin interace, ‘Resources/Desktops/New’, select ‘a new VNC remote desktop
Select the connector which is adjacent to the VNC Server
Give this VNC Desktop a name. You will use this in the Profile to select the machine
Select the address (as the connector would see) it of the VNC server. E.g. on the machine running the connector, you should be able to ‘ping’ this hostname. NOTE: if the connector is on the same machine as the VNC server, you may need to ‘enable loopback connections’ in the VNC Server configuration.
Optional. If you wish to have the Profile VNC Web interface auto-sign-in (after you have presented your single-sign-on-credentials) you may enter the read-write (and/or read-only) password of the VNC server. If these are set, users may be forced into a read-only role by permissions later.
Assign permissions to who may use this desktop. If ‘viewer’ is selected, and the read-only password was given above, the user will be auto-signed-in as a read-only user.
At this stage, you can open https://profile.MYDOMAIN and you should see this VNC resource on Desktops.